Saturday, 13 January 2024

Blood and Crowns: the battle in the bay


The County of Pigourdy


Background
The Count of Phoque was killed fighting the English King in Flanders in the Spring of 1340.  The closest heir in line of succession was his cousin Phallus de Farandole, an English Knight, and friend of King Edward III.  The French have promoted the cause of Amal Sieur de Phoque, a Knight who had hurriedly and scandalously married the widowed Countess. 

Within the County the French King`s appointee has been grudgingly accepted by all but the Abbot of St. Dongé, who thouroughly disliked  the new Count.  Rumour has it that the Widowed Countess had entered a nunnery before being abducted by the Sieur de Phoqué.
The English Knight is of course furious.  Without seeking King Edward's permission De Farandole has gathered a few ships and made haste from his stronghold in north Durham for the coast of Pigourdy. 
The English have no horses, and limited supplies.


My campaign rules

Several nodes are marked on my campaign map.  These are followed in a linear manner and a scenario is diced as the node is reached.  The scenario will assist in creating a narrative for the game, essentially a back story.  

The implications of this are that the side I don't play becomes randomised, and this is built into the narrative.

Success in the campaign is quantified by honour points accumulated as well as the capture or killing of the enemy's principal character.


The English
249 points
Knight Banneret Phallus de Farandole, of Durham
Retinue 6 Men-at-Arms, Afoot @42 plus Musician @3
Main Battle
6 Archers, English @60 plus Vintenar@5
6 Archers, English @60
4 Spearmen @16
4 Spearmen @16
Vanguard
6 Men-at-Arms, Afoot @42 plus Banneret @5 Quincy de Lumley

English Army in France 
Crecy to Poitiers, 1345-56 
 main battle 
Archers, English | Footmen  (Spearmen*) 
vanguard 
Men-at-Arms, Afoot | Footmen  (Gascons) | Veteran Footmen (Gascons) | Welsh Archers 
reserve 
Veteran Men-at-Arms, Afoot |  Veteran Men-at-Arms, Mounted |  Men-at-Arms, Mounted | Veteran  English Archers 
Special Rules Chevauchée: This Company may choose to add  +2 to their roll when determining the attacker in  a scenario.
*Spearmen may not take the Polearms upgrade.

The French
250 points
Amal, Sieur de Phoque
Knight Banneret, 6 Veteran Men at arms, Mounted @72
Banner "Phoque Rien" @7
Musician @3
Main Battle
6 Men-at-Arms, mounted @72
6 Crossbowmen, Genoese @54
Vanguard
6 Men-at-Arms, Afoot @42

French Army 
Crecy to Poitiers, 1345-56 
main battle 
Men-at-Arms, Mounted | Crossbowmen, Genoese* | Crossbowmen, Light | Feudal Levy 
vanguard 
Men-at-Arms, Afoot | Esquires  | Footmen | Veteran Men-atArms, Mounted 
reserve 
Veteran Men-at-Arms, Afoot Special Rules *Genoese Crossbowmen have the Mercenaries  special rule.

The Campaign Game begins

The Descent on Cadzon

Game One, the descent on Cadzon.  I based this loosely on Sir Walter Manny's attack on Cadzand.

The Campaign map

PIGOURDY LUDO

From the Chronicles of the Abbot of St. Dongé

Rounding the Isle of Cadzon the Lord Farandolé saw a laden French Merchant ship in the roads of the Baie of Turdes. The Sieur de Phoque's banner was flying over the castle on the Island.  The English decided to strike a blow at the French.

Mini Campaign: The Baie of Turdes


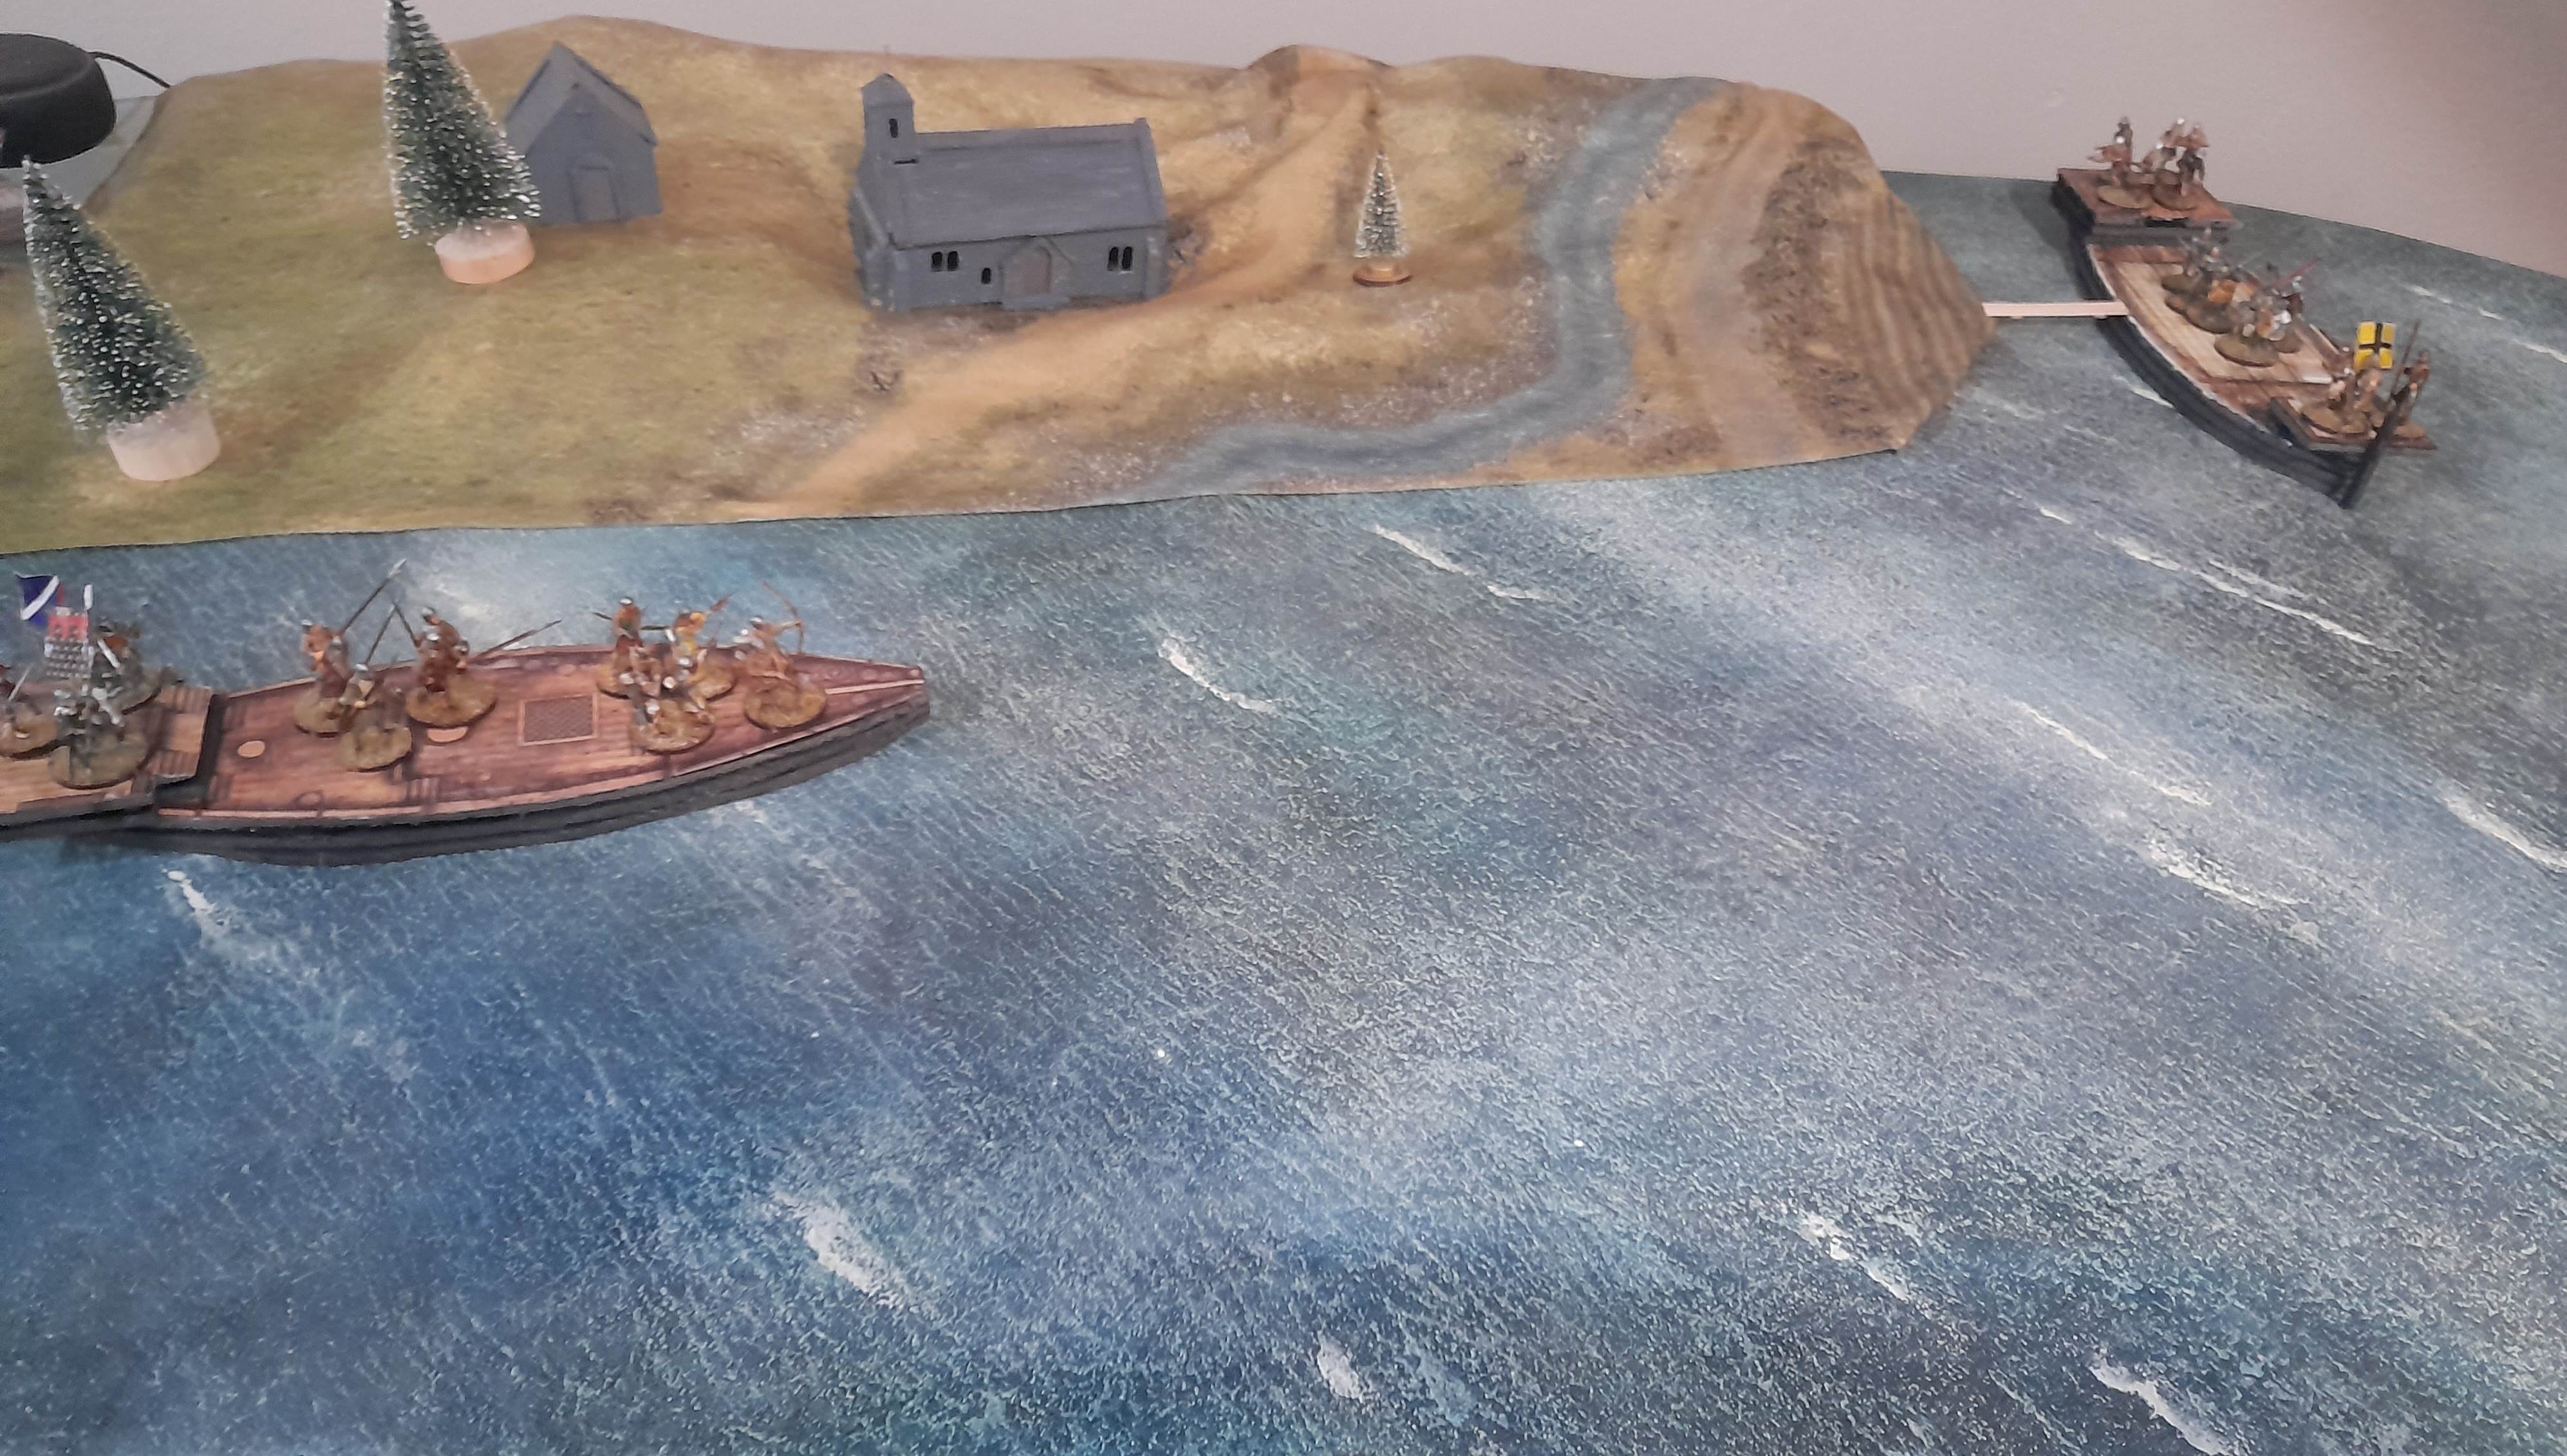
The balinger Proud Mary leads the English attack. Sir Phallus is Aboard with his retinue, a group of Mariners,and a group of Longbowmen.  

Proud Mary opens with warbow shooting.

The French Roundship Edith de Piaf has Genoese Crossbowmen and Men at Arms Aboard.  The shooting is even.

A second English Balinger appears, the Franklin of Aretha.  This has a similar crew.  The English are lucky with the wind as they run into the bay to attack the Frenchman.

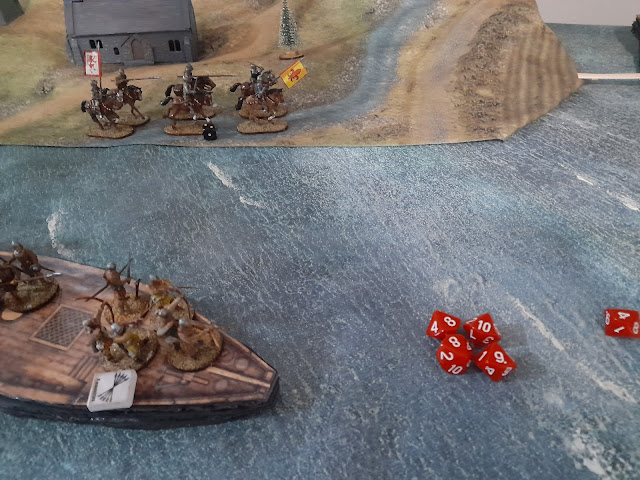
A distance shot as the Sieur de Phoque's Mounted Men at Arms Retinue appear ashore.  They Gallop parallel to the balingers' course.

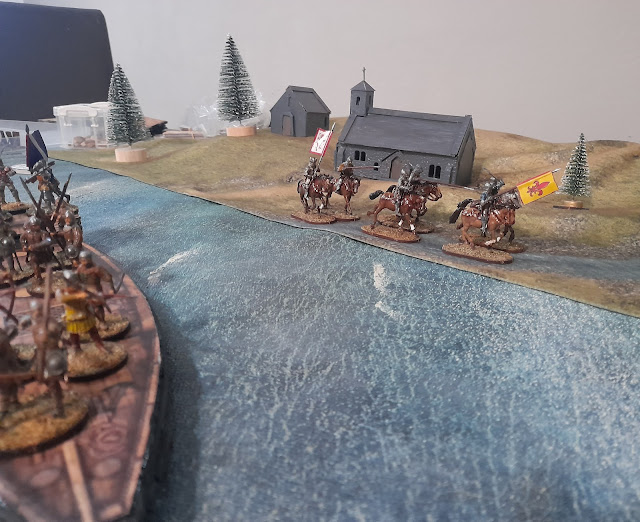
The English archers target them, killing two!

Damned dangerous fellows these bowmen.

Proud Mary begins her turn and the bows target the French crew.

The forecastle is Shaken and routed in one volley.


But it's the Franklin of Aretha that grapples and her men at arms fight their way Aboard.  a clearing the decks honour point is won.

Notice however that at this point the sneaky Genoese Crossbowmen deploy pavieses, even though they are in a hard cover stern castle.  Dodgy dealings I think, but at this point they are duelling with Proud Mary's longbowmen and coming off worse because of the slow Reload.

Piaf's Men at Arms fail against the attack that boards from the Mary. Poor performance!

The Farandole retinue storm the stern castle routing the Genoese overboard.

The endgame as the Roundship is taken.  The retinue of Phoque is ashore and makes off to shelter in the castle.

An undignified retreat for the French!


Monday, 25 December 2023

Burning Scratchy Bottom

Blood and Crowns

Once again using my WOTR figures.


Sir Hugo and his Company advance on Scratchy Bottom, unaware of the Sherrif's men moving from Cold Keep.

Sir Hugo's forces.  Turns out I have a lot of Wars of the Roses figures.

With the village to my front I advance.  

Opposite the enemy come on.  Big forces!

The Yorkists push their bows forward

And as the lines close I go into interpreting the rules mode and forget to take more pictures.

Unfortunately I must report a loss for Sir Hugo, and his retirement from the field towards Ballsup Tower.

A nice little mini campaign that I'll have to repeat.

East Africa 1914

Whilst seasoned Indian Army troops were sent to more important battlefields in WW1 a ragtag group of Imperial Service units, raised by local Indian Magnates and Potentates was sent out to Mombasa, with the intention of protecting British East Africa from the German colony to its South.  

The first to land, the 29th Punjabis were already on a train bound for Voi accompanied by a 12-pdr naval gun from HMS Fox by 6th September. A half battalion (4 companies) of each of the Jhind, Bharatpur, Kapurthala, Kalabar (single company) and Rampur Imperial Service Troops – the armed forces of independent Indian potentates – a Volunteer Maxim Gun Company, the Calcutta Field Battery and the 27th Mountain Battery followed, and by mid September they had been ordered to take up positions protecting the Uganda Railway

History records very little of the War Service of the "Kalabar Imperial Service Company" shipped to the colony early in 1914.   Serving under Captain Valentine Keen, who had married the daughter of the former Khasi the company boasted 200 Sepoys.  Serving with Keen was the Young Khazi as his 2nd Lt and adjutant.  

Keen was tasked to support Major Selous Parker of 3 King's African Rifles, since his Mountain trained Infantry were new to the African Bush.

(Note that the participation, and indeed very existence, of the Kalabar Company is in fact only recorded in the papers of controversial historian and alien apologist Prof Augustus P Farthingdale of the University of North Dyrham.  His work has been Pooh-pooh-ed by serious historians.)

Elements of 3 KAR

The encounters at the beginning of the war saw German demolition teams attempting to break through to the railway.  They would typically consist of A few white colonists 20 or so Askaris and perhaps an Mg team if an ambush was planned.  British counter measures to these saw infantry encampments scattered along the Uganda railway in unhealthy and frankly dangerous locations, as well as aggressive patrols amoured trains. 

My first "tester" game will use a combination of "Patrols in The Sudan" terrain rules and "Blood and Valour" WW1 rules, with a German raiding patrol attempting to reach the railway line.

The Forces.

150 points

BRITISH EAST AFRICA UNITS:

British Lieutenant Command Team:

BRITISH LIEUTENANT  (COMMANDER) Shoot Close  Combat Shoot  Save Close   Combat Save Resolve Cost Initiative Command  Range Command  Points 6 6 5 7 6 0 2 8” 1 UNIT COMPOSITION: 1 Commander, 2 Riflemen SPECIAL RULES: Assault Experts WEAPONS: 1 Pistol (Commander), 2 Rifles


British European or Colonial Riflemen Units:

These units represent the troops sent from the British Isles, India, and South Africa.   


BRITISH RIFLEMEN (CORE) 

Shoot 6, Close Combat 6,  Shoot Save 6, Close Combat Save 7,  Resolve 6,  Cost @16 Initiative 3.  UNIT COMPOSITION: 4 Riflemen (add models for 4pts. each, max 12 models in unit) SPECIAL RULES: Assault Experts WEAPONS: Rifles 5pts. – Add Grenades to entire unit 8pts. – Add a Light Machine Gun model to this unit (max 12 models in unit) 

BRITISH KING’S AFRICAN RIFLES (CORE) 

Shoot 7, Close Combat 6,  Shoot Save 6, Close Combat Save 6,  Resolve 5,  Cost @16 Initiative 2.  UNIT COMPOSITION: 4 Riflemen (add models for 4pts. each, max 12 models in unit) SPECIAL RULES: Blood Curdling Charge WEAPONS: Rifles


GERMAN EAST AFRICAN 

COMMAND TEAM:

German Leutnant Command Team:  

GERMAN LEUTNANT  (COMMANDER) Shoot Close  Combat Shoot  Save Close Combat  Save Resolve Cost Initiative Command  Range  Command  Point 6 6 5 7 6 0 2 8” 1 UNIT COMPOSITION: 1 Commander, 2 Riflemen SPECIAL RULES: True Grit WEAPONS: 1 Pistol (Commander), 2 Rifles


CORE UNITS:

German Schutztruppe Riflemen Units:

The Schutztruppe was made up of European Germans who lived in Africa for many years.  GERMAN SCHUTZTRUPPE  (CORE) Shoot Close Combat Shoot Save Close Combat Save Resolve Cost Initiative 5 6 6 7 5 20 3 UNIT COMPOSITION: 4 Riflemen (add models for 5pts. each, max 12 models in unit) SPECIAL RULES: True Grit WEAPONS: Rifles 8pts. – Add a Light Machine Gun model to this unit (max 12 models in unit) 

German Askari Riflemen Units:  The Germans built up a strong force of native Africans to help them fight during the campaigns in eastern Africa. These units performed much better than their counterparts that fought for the British. While they were equipped with very poor rifles during the war they excelled in close combat.  

ASKARI RIFLEMEN (CORE) Shoot Close Combat Shoot Save Close Combat Save Resolve Cost Initiative 7 6 6 6 5 16 2 UNIT COMPOSITION: 4 Riflemen (add models for 4pts. each, max 12 models in unit) SPECIAL RULES: True Grit, Blood Curdling Charge WEAPONS: Rifles


German Heavy Machine Gun Team:

The German Army used the Maxim Machine Gun as their primary mounted machine gun.  GERMAN HEAVY MACHINE  GUN TEAM (SUPPORT) Shoot Close Combat Shoot Save Close Combat Save Resolve Cost Initiative 6 6 6 7 6 20 1 UNIT COMPOSITION: 3 Soldiers, 1 Machine Gun SPECIAL RULES: WEAPONS: 1 Heavy Machine Gun


My East German Force.  Command group, 2 groups of Askaris, a group of Colonial German Infantry and a heavy MG. Scouting ahead are a group of Ruga-Ruga, probably former slavers.


The Game.


The Indian Army deploy three terrain pieces.  Its a raid so their camp will be the ninth piece.  The German column advances on behind its scouts.

Two terrain pieces are scouted but the dead ground ahead is a possible ambush location.

Tribal Auxiliaries pop up in the dead ground.  Scouts for the British.  They will fire once and then attempt to vanish back into the terrain.  I allow them a shot out if touching the edge of dead ground.  This however means that they can be seen.

Leutnant Maximilian von Spittle, Feld -Compagnie Officer.

The Ruga Ruga lose men to a ragged volley.


The German Colonials shooting is fair...

Using the dead ground as cover 

I get the mountain gun ranged in

The Indians move forwards

German Askaris begin to take casualties

The Indians storm the rocks.

And the Askaris can't handle it

My German Officer attempts to stem the tide.

But the Indians have taken the flank.

The end game.  More East Africa to come I think.


Wednesday, 15 November 2023

The Ambuscade at Pratt's Bottom

 "A histore of divers warrs and right owlde bovver in Ye  County of Midshire."

A first try of Blood and Crowns.

It is July 1456 and once again Lord Farthingdale has refused to pay his taxes to the Earl of Midshire.  Fearing that the Earl is supporting the Pretender, the Duke of York, his former Excellency declared for the Lancastrian King and gathered his retinue and tenants at Potter's Knob.  

The Earl has sent his henchman, FitzQuilp, the Sheriff of Much Rutting, a twisted hunchback peasant of a fellow, a vile strutting hairy imp.  A man who smelled of turnips ... Well you get the idea.

The Earl's lackey Sheriff FitzQuilp has gathered his forces and advanced to cross the River Tickle, and set ambuscade at Pratt's Bottom determined to put an end to the Lancastrians.


Dramatis Persona
Avery Oddman, Earl of Midshire
Squire FitzQuilp - the twisted crookback, Sheriff Of Much Rutting, obsessive tile collector 
Lord Hugo de Farthingdale, an Obese individual Without Honour! 
Sir Quincy de Whitemoore an insane aristocrat, and his poltroon brother Sir Oliver.

Midshire.  Avalon Hill's Robin Hood is the basis of the map.


Sir Hugo

Vanguard

Two Groups of trained archers

Main body

One group of trained billmen

One group of trained Men at Arms afoot.

Reserve

One group of Veteran Men at Arms afoot


Ambuscade Objective Markers:  None Scenario Rule:  Escape!: Defending units escape and are  not considered eliminated if they intentionally leave the table by having all models  within 3”  of an Escape Edge and performing  a Move action. Defending units do not Fall  Back towards a table edge or deployment  zone and instead move toward the center  of the Objective Area.

Deployment:  Attacker chooses two deployment zones  and may place units in either of these deployment zones. The defender may place  their units in the Objective Area. Starting  with the attacker, players alternate placing  units until all units are deployed.

Additional Feats of Arms:  Starting on Turn 6, during the End Phase:

» Attacker gains +1 Renown for each enemy unit within the Objective Area.

» Defender gains +1 Renown for each unit  that is no longer within the Objective Area  and is not Shaken or Engaged.


Determine Scenario by rolling 1d10:

1)  Ambuscade 2)  Seize 3)  Pillage 4)  Burn 5)  Rearguard 6)  Regicide 7)  Formal Combat  8)  King of the Hill 9)  Defender’s Choice 10)  Attacker’s Choice


The Game

I have Sir Hugo three units, a bow bill and Men at arms.  It's a rules tester game after all.  The enemy mirrored this, with an additional bow group.

Surrounded.  The Lancastrians attempt to break out.

A heroic charge by the Lancastrians billmen.  They only get near because the shooting was dire.

And the Lancastrian bowman knock down their opposite numbers.

Sir Hugo begins to fight clear.

Sir Hugo leads the charge.

The Men at Arms go through the bills throwing them back.  The Lancastrians are heading up table.

Game over.  The Yorkist Men at Arms don't reach the fight as the Lancastrians escape the ambuscade.