Showing posts with label The Meckel Map. Show all posts

Saturday, 18 May 2019

The siege at Wirthshaus Zum Lamm, Red vs Blue


The siege at Wirthshaus Zum Lamm

The Blue have fortified a strong point, a farm on the flank held by a single company of under a charismatic Blue officer.
Your Orders are to go there and kill them please.

The "charismatic" Blue Officer is Major Finguin, with his Legere Skirmishers and a gun.  For "charismatic" read ...handsomely Fat.  

He has some civilians/guerrillas under his command mustered into a group as poor local militia.  The Blue are up to something here, and have a wagon loaded in the farmyard.


The "What's Going On table."

1.   The Spy                                 
2.   The 83 year old Nun
3.   A Red officer is a traitor      
4.   Torturing Count Bresslaw
5.   Saucy Miss Windsor             
6.   Dragoons down the road 

The good thing is that I don`t actually know what Blue are up to and won't until half way through the game when I roll on the list of 6 possibilities.  I sincerity hope its not that 83 year old nun again.  She caused havoc last time.

The Red Force has been randomly selected for this one since blue drew this card.


Red may use declare two entry routes A to C as his deployment points.

Blue must use the strong-point, but may also choose a secondary deployment point from the other two blue dots.  Clearly Blue has prepared this site and Red may face an ambush.

Blue Forces
1. Major Finguin 
2. Capitain La Pisse
3. Sergeant Gros Bouton
Two Groups Voltiguer Skirmishers
Two Groups Voltiguers deployed as Line.
One Gun and Crew
4. Count Bresslaw of Der Erzbistum der Weißen (the White Archbishopric)
One group White Militia

Red Forces

1.  Captain Quilp of the King's 4th Foot
2.  Lieutenant Dick Wellhard
3. Sergeant "Mother" Postlethwaite
Four Groups of Regular Line
One Group Line Skirmishers
4.  Ensign Max von Flatulenz of 3rd Royal Artillery with his 9pdr and crew.
5. Lieutenant Charlie Hawtrey and a troop of Red Hussars


The high point on the southern edge is flat, but the slope up to it is rocky.  The copses of trees are also difficult going.  The Blue Major has loopholed the farm walls and blocked the gates with a wagon.

Orders from Captain Quilp

Lt Wellard shall take command of the skirmishers. I myself will command the line, assisted by Sgt Postlethwaite.
Wellard will deploy his skirmishers from point B and advance through the wood in order to flush out any of those damn Blue egg tappers. He will be assisted in this by Lt Hawtrey, who will lead his Hussars down the road, also from point B.
With our flank secured thusly, I shall lead the line in an attack on the strongpoint, from point A, supported by Ensign Flatulenz and his big piece.

Cpt. Quilp (4th Foot)

Wirthshaus Zum Lamm

Dick Wellard leads his skirmishers from the woods
The Blue deploy in the courtyard.  Militia well to the rear.
Unfurling the Blue Colours..
Lt. Hawtrey and the Red Hussars arrive

 Ensign Max von Flatulenz of 3rd Royal Artillery beats away with his meaty 9pdr 
And the Blue Line start to receive casualties.  At this point a Spy is revealed, hidden in the Villa.

The skirmisher battle on the flank...

Wellard's men get the best of it but cant seem to kill that Voltiguer Officer

The gun begins to kill Blue line troops, even behind that wall

But a volley from the farm kills two gunners.  Hawtrey moves up to support.

More Voltiguers join the flank battle

And in the courtyard that gun has really taken a toll.
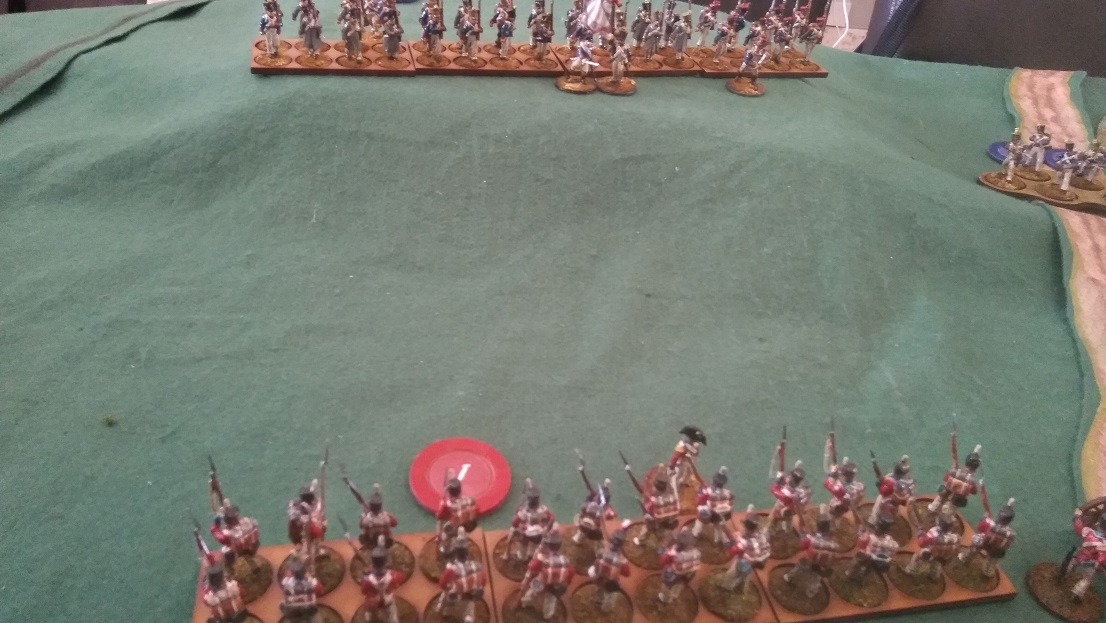
Now's your time Quilp, as the Redcoats move into line and advance, neatly masking the gun from further fire.

Charlie and his boys gallop off to seek mischief elsewhere

And on the flank the Voltiguers fail to impress
Wellard kills another four Voltiguers, and the Blue officer fails his roll, shot through the shako he falls.
  
The red line unleashes its first volley and kills six, before it charges home with the bayonet
Quilp leads his men in an assault on the courtyard.  The Blue Volley is largely ineffective.

The Red Line break into the courtyard and Blue are sent reeling.  The Spy is captured and Red win the day, hoorah!  The road to Schonkirch is open! 
And in a last act on the flank The Red Hussars charge down the retreating Voltiguers and massacre them in fine style whilst Wellard and his men look on in disgust

Saturday, 11 May 2019

Arresting the Mayor of Seedorf, Red vs Blue


Turn 4
The Mayor of the nearest town is another traitor.
Local Militia close the town in the enemies name.
The Earl of Brent commanding 1st brigade sends his Squadron of Red Hussars to arrest the Mayor.

Red Forces

1.  Hussars Lieutenant Charlie Hawtrey
One group 8 Hussars
In support
2.  Rifles Sergeant Terrance Scott

1 Group Rifles
3.  Rifles Lieutenant Quentin von Wießmehr. (Nicknamed the Fidgeting Midget)
1 Group Rifles

The town of Seedorf.

Filled with Civilians.  until the event chip comes out I won`t know which is the mayor.

Hawtrey and his Red Hussars.  Ok so not painted except for blocking.  An afternoon of detailing needed on these.

And Sergeant Scott deploys with his group.  No sign of his Officer.

Blue dragoons deploy on foot to take cover behind the wall

Scott and his Rifles exchange fire with the Dragoons.  No contest really

Two dragoons killed two shock

The Event Chip arrives just after Blue deploy a squadron of Mounted dragoons.

The Mayor is spotted in conversation with an female woman, and what a woman...  With his reputation?  Are they mad?
Hawtrey and the Blue Dragoons go at it.  Hawtrey needs to train his boys.  He loses five men and is unhorsed and captured.

The Dragoons look deadly.  They are obviously painted troops with higher morale.
The Dragoons chase the Hussars to the Deployment point capturing it.  Red's game is over


I note that Rifles Lieutenant Quentin von Wießmehrd not appear on table  His chip wasn`t drawn.  It didnt dawn on me until after the Deployment point was captured that his chip was missing from the bag.  Perhaps the Earl of Brent called on him for another mission, but it seems harsh that Brave Terry Scott was left to retreat with his men.

Clearly the lesson from this is that partially painted troops do not pass muster and that my Dragoons treated the Hussars with contempt.

Shovels at Gut Waldau. Red vs Blue

As Red advanced units crest the Doppelberg... Scenario 5  Attack an Objective-Battle.

Shovels, shovels, shovels

Stores Officer Uriah Hackenbush has a wagon load of dodgy military stores that must be escorted to the main body from the nearest farm which he has established as a depot.  

Unfortunately the enemy know about the  supply convoy and an attack is imminent.  

Scenario 5  Attack an Objective-Battle

A Red company must get the wagon to, and then defend, the farmstead, and a plot complication is that a traitor .
is in their midst.

The list of possible traitors is generated from both the officers in the defending force and any of the three Civilians in this location,
Otto the mule guy, Paymaster Uriah Hackenbush and the Blue Nun.

Red Forces
1. Captain James Dale
2. Lieutenant Bernie Cribbins
3. Sergeant Pete Butterworth

4. Leutnant Trocken Stuhl
1 Group Skirmishers
3 Groups Line
1 Group Militia

Blue Forces
1. Major Jurgen Blödsinn
2. Skirmisher Sergeant Grande Jambe
3. Grenadier Captain Grüße Mörder
4. Line Sergeant Schreihals

The Column pokes its nose towards Gut Waldau

The Red Line with skirmishers to the right

And at the farm a group of Red Militia.  

Beside Captain Dale is Storemaster Uriah Hackenbush, he of the huge mustachios, sarcasm and blazing dueling pistols.  An enthusiastically home made figure

Up on the hill Blue arrive

The Blue skirmishers race for  the farm

Red skirmishers, outnumbered take cover behind the wagon

The Militia bravely shuffle back into the cover of the farmyard

Blue skirmish fire is ineffective.  that must be a thick planked wagon.

The red Line closes the distance

Looking good so far

But the Blue Grenadier Officer has a brainwave and takes his group to attack the farm, covered by the skirmishers

Blue first fire is devastating 

The Grenadiers charge into the buildings at bayonet point.  Its a massacre 
The surviving Militia flee.  The spy is revealed on the Event chip.  Its the Nun with the Gun!

With a finger on the lens I chase the Militia across the farmyard.  The wagon will be the centre of the fight.

The lines square up for the final volleys

And brave Captain Dale falls, pierced by a ball to the gorget

Bad things happen as the red line collapses and runs for it

The Red Light Company defends the Deployment point as Blue advances.  It's a tremendous win for Blue who have captured the wagon load of shovels.