Wednesday 27 June 2018

The Road to Yorktown: Peninsula 1862

Game five and six are the last of my Peninsula games for now.  They are due to be fought next week but since the planning is all done I decided to blog this to help me keep track and focus on the individual games.

The Campaign bit...

Last time in the Peninsula:

... saw a long awaited win for the Union, but against only a weak Confederate Company.  


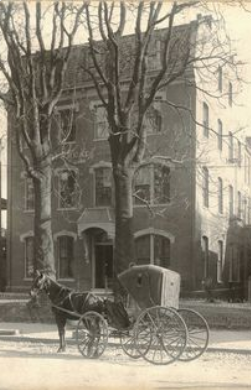
Virginia Hospital as seen 1882
Alas Colonel Quincy Ewing Whitmore of the 7th VA Infantry was felled by a ball to the chest and is currently residing in the Chimborazo Hospital, Richmond VA.  His Doctors have recommended a Mint Julep* and grits diet.  He will be out of the game for six months.  The feint strains of a banjo waft from the terrace...

(*  The mint julep is a mixed alcoholic drink, or cocktail, consisting primarily of bourbon (or some other spirit), sugar, water, crushed or shaved ice, and fresh mint. As a bourbon-based cocktail, it is rumoured to have been invented by Colonel Quincy Ewing Whitmore  at a party in Kentucky during the hot summer of 1842.  The origin and composition of grits is still a mystery)


Civilians:

Old Dr Meade - Fiercely partisan, for the South

Aunt Hamilton  -  Civilian is assaulted by one of your men

Big Sam, a slave who wants to escape  -  Will give information on the enemy deployment

Mammy, an escaping slave

March 20th 1862

The 11th Massachusetts send out four Companies, north from their camp, along the Yorktown road.  

At 8am they reach the Morrison farm, and a company is sent to capture Seaford, and secure the flank of the marching column.
Here they encounter Mammy, an escaped slave being held by Morrison who has captured her and wants the bounty.  Mammy claims there are no Confederates this side of Yorktown.   The Parson wants to send her south to Fort Munro, but Mammy rolled a 12 and has taken a real shine to the Captain.  She offers to guide the 11th over the terrain towards Yorktown.

By 10am the column reaches the Hamilton Farm.  Old Aunt Hamilton claims that she has been assaulted by Sergeant Winston D. Groper.  Groper claims that he was searching for hidden weapons.  The Parson will have to watch that boy...

Big Sam, a slave on the Hamilton place is also encountered and volunteers to lead the Union forces to an unguarded ford to the east.  Captain Crane takes his company that way.

The Parson with two remaining companies heads for the Yorktown bridge.  The York river is an obstacle that needs to be crossed, but the 11th Massachusetts discover the redoubts built by the Confederacy to the north of the position.  Old Dr Meade (who rolled a four) a fiercely partisan Southerner is encountered and tells them that he will be fixin' up their wounds shortly!

The Parson sees that the way to Yorktown is clear, and crosses the bridge with a single company, only to find that the 7th Virginia has moved up to face him in a defence in depth game.

Captain Crane meanwhile, lead by Big Sam, crosses the York unopposed at a newly discovered ford, but faces a fight against the New Orleans Zouaves who march out of Yorktown, approaching to face him in an encounter battle...
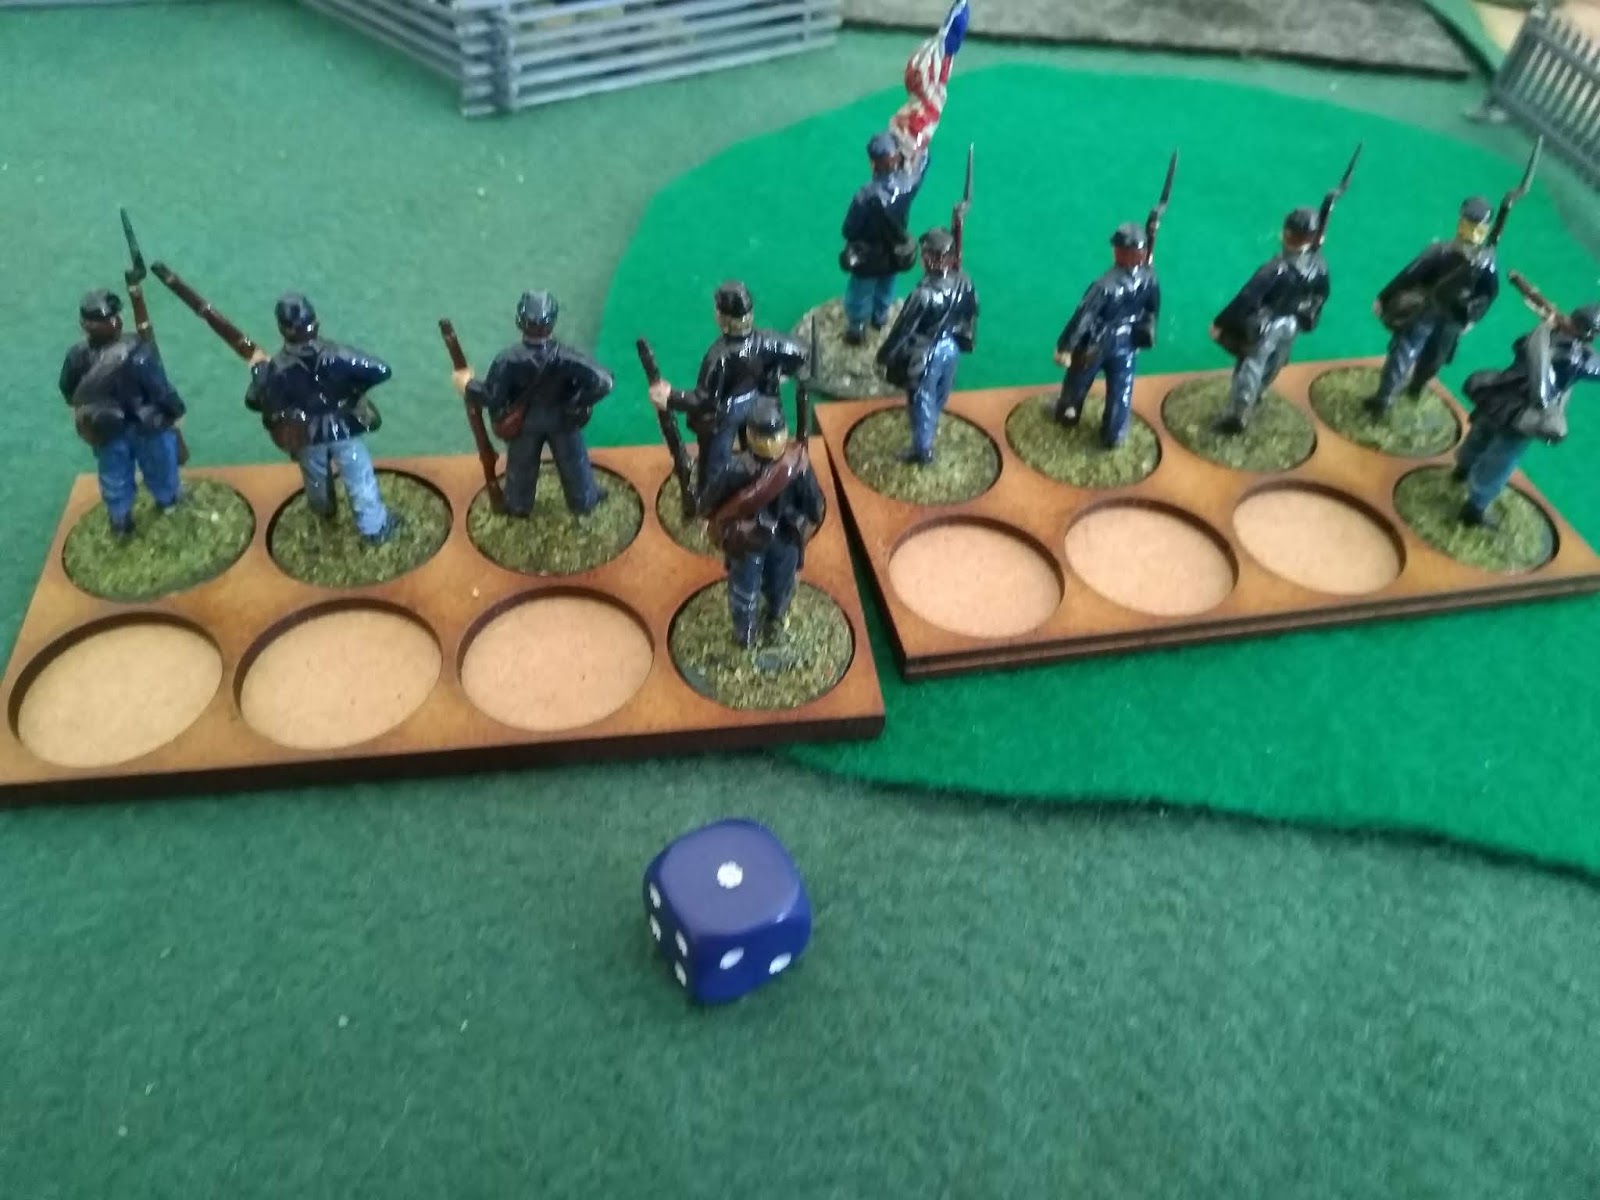
Game Five


The Parson has a six company Union force of the 11th Massachusetts, facing a Confederate force of a similar size.  The York River is a difficult obstacle, so the bridge is the only real way over.  
Captain Farthingdale has his work cut out for him on this terrain.

Game 6


Captain Crane faces a four group Zouave Company, and an emplaced gun.  He has a five group company.

The fence lines are light cover, as is the peach orchard.


Jackson's farm: Peninsula 1862, Game 4

Last time in the Peninsula:
Captain Floyd "the Parson" Farthingdale walked into a trap.  He managed to lose three groups but kept his Officers alive!

Colonel Quincy Ewing Whitmore held his ground, but could not pursue.  The Union will be able to advance from Kiln Creek this turn.


The Parson leaves Kiln Creek at 8am and has soon reached Grafton.  Here he is confronted by Grandma Wilkes astride her old mule.  She gives him a sample of her pro-Southern feelings with a rendition of Dixie, but the Captain is a Gentleman and merely bows before leading his men in a hymn.

At Grafton Bridge the banjo playing Billy-bob informs the Union Officers that the rebels are nowhere to be seen.  Unconvinced the Parson deploys across the bridge, and faces a company of the 7th Virginia.  He ensures that both Billy-bob and banjo are thrown into the Poquoson River.  

It seems however that unlike the Yanks, the Confederates are running short of men since they can only field three groups plus skirmishers.


12 Noon the Union advance in two formations, skirmishers into the woods on that left flank. Captain Frasier Crane takes the left, the parson on the right, and Lieutenant Niles Crane the Skrimishers.
The Parson advances at a slow walk.


The Union Skirmishers are reluctant to get into those woods!  Is Lieutenant Niles Crane a yellah belly?
The Confederates hunker down behind a split rail fence.  Full of tricks Colonel Whitmore!


The Union skirmishers take on the rebel skirmishers in the woods. Lieutenant Crane leads from the rear.

The Colonel draws three flags.  This is going to be nasty!


The Union ranks are starting to thin... but they have four groups to three in the firing line.

The Parson gives them a controlled volley, and the Rebs stagger back.  Colonel Quincy Ewing Whitmore takes a ball to the chest.  Six months in a Richmond Hospital and it will still be touch and go...  

A long awaited win for the Union, but against a weak confederate Company.  Rumour in the Company is that it was the Parson himself who used his Navy Colt to shoot the Reb Colonel!  Praise the Lord!

Alas the Colonel will be out of the game for some time.  I shall order in some Old Ma Finnigan's Patent Restorative and Purgative, and perhaps Billy-bob's soggy banjo playing will speed his recovery!

Da da... dang dang... dang dang... dang dang... dang... Yeeh-har!

Kiln Creek: Peninsula 1862

Last time in the Peninsula:
Senior Captain Marion P. Perv went missing in action with Miss Daisy
Captain Titball took a ball to the leg.  3 months recovery
Lieutenant Sackrider shot in the head.
Sergeant I.P Freely captured... yes Captured, by the rebs!

Lieutenant Mike Krotch of the Confederate Zouaves shot in the chest and expired in the arms of his Captain.  

The 11th Massachusetts morale is at an all time low.   This however is the time Parson Floyd Farthingdale returns to the Regiment, following his convalescence.  The Parson had been wounded at Balls Bluff, but the 11th are once again his "Flock."

Leaving Hampton the Company march through to Northampton, going cross country, skirmishers forward.  Reaching Cobbb's farm at 11am the Company advance on a poor dirt track to Kiln Creek, where the rebels have thrown down the poor houses and used the wood to construct defences.

Roscoe, a dirt farmer from Northampton guides the Union Company north to kiln Creek for a passel of them thar Yankee dollars. 

Preacher Welby is also encountered on the road, spouting his pro Southern views, but Parson Farthingdale is a fervent abolitionist and has the preacher thrown into the Creek by Lieutenant Niles Crane.


My hills need some work!

The Parson back, leading his flock.  The trademark Bible clutched to his heart. (Although Company rumour has it this is actually strong Victorian pornography)

Confederate Skirmishers on the heights

The Parson advances on the left, in two lines.

The rebel skirmishers cut the union to pieces

Captain Farthingdale sends his company onto the heights, but one of his groups pokes its nose into the trap

The Confederate Skirmishers withdraw as the Union take the heights

The Union lose a group to all of that crossfire

But then it looks as if it is the Confederates who are struggling.  Colonel Whitmore stands firm...

The Confederate skirmishers put up a tremendous fire to break another Union group.


But with only two groups left from an original five the Parson must withdraw to await reinforcements.  

Just for once no Officer casualties!  Still a resounding win for the Confederates.

Saturday 16 June 2018

Northampton Bridge March 16th 1862

Titball advances

Last time in the Peninsula:


Major Quilp took a ball to the chest, RIP

Sergeant Butt was shot in the Butt, RIP
Captain Titball (and there is no easy way to say this) ran away. 
The boy learned that one at West Point... word in the Company is that his nerve is gone.


March 17th, the Union send a company out.   


Sr Captain Marion P. Perv

(III)

Captain Titball   (II)
Lieutenant Sackrider  (II)
Sergeant I.P Freely (I)
4 Regular Groups, 1 Skirmish Group

Crossing by boat takes time but the column arrives on the foreshore in Hampton at 0900.  By 1100 they have made it through the town.  Miss Daisy is encountered and lures Captain Perv away into a tryst up her alley.  Perv is not seen again and Titball must take command.  Undeterred he presses on.


By 1300 the column has reached the Wilson farm, and heads towards the bridge.  on the road they encounter Mayor J. D Hawg, who is firmly a southerner, but susceptible to a bribe.  


Hawg reports the presence of a weak company of Louisiana Zouaves at the Bridge.  Titball has the overconfidence of an idiot and presses ahead, Keen to prove that he has not lost his nerve (but we all know differently)  If he can capture the bridge the union will have a route north onto the Back River road.


The game will have only a maximum of 8 turns.


CONFEDERATE ZOUAVES, 1862
Captain Auguste Finnigan,  Leader, Status III 

Lieutenant Mike Krotch,  Leader, Status II 
Three Groups of 8 Infantry, Rifled Muskets
Jacques Strap,  Leader, Status I 

One Group of 6 Skirmishers, Rifled Muskets  

Civilian reaction table


2.  Can be bribed

3.  Fiercely partizan, North or South
4.  Absolutely uninterested
5.  Will give information on the enemy deployment
6.  Charms the leading Officer
7.  A Rebel Spy
8.  Claims that there is an enemy force nearby (D6 for direction)
9.  Claims that there are supplies nearby
10. Civilian is assaulted by one of your men
11. Leads the Officer into a tryst(female) or trap (male)
12. A dangerous mad person who attempts to assassinate an Officer


Scenario 3  Defence in Depth  Battle


The game is a Battle.  One side is attacking a position, which is held in depth.        

DEPLOYMENT POINTS 

Blue has One Deployment Points for this game.  


His  Primary  Deployment  Point  may  be  placed only on the road entry.  


Grey  may  place  a  Primary  and  Secondary Deployment Point within 6” of the Confederate baseline.   


Both  sides  may  add  other  Fixed  or  Moveable Deployment Point if available.   

Note that the river is only a minor obstacle at this time.


FORCE SUPPORT 


The Union has 8 Support points.


The confederacy also has 8 support points, but has 2 static defences to deploy.


OBJECTIVE   


To win a victory Blue must capture Grey’s Primary Deployment Point.  If that is achieved, the game will end immediately.     


TERRAIN & MINOR CHARACTERS 


There are no specific terrain requirements for this scenario.   


No civilian  Minor Characters are present.  


The terrain


Lieutenant Sackrider advances behind his Sergeant

The Union Skirmishers advance under Sergeant Freely 
Titball's column advances through some hessian sacking.  As far as Titball is concerned it's a wheat field.
The New Orleans Zouaves of Capitane Auguste Finnigan deploy


More Zouave Skirmishers appear on the hill above Sergeant Freely.


Titball gets into the action.  Lieutenant Mike Krotch of the Confederate Zouaves is shot in the chest and expires in the arms of his weeping Captain.  Well there had been rumours...


The Union Skirmishers break as Sergeant Freely is knocked unconscious.  They leave him there and Freely is later captured and held by the Zouaves.

Sackrider advances into the bear pit.

"Them thar Zouaves can sure shoot."  Titball is hit in the leg.  The Union is at breaking point.


Sackrider is shot in the head.  The Union break.


A Quick recap:
Senior Captain Marion P. Perv went missing in action with Miss Daisy
Captain Titball took a ball to the leg.  3 months recovery
Lieutenant Sackrider shot in the head.
Sergeant I.P Freely captured... yes Captured, by the rebs!

Lieutenant Mike Krotch of the Confederate Zouaves shot in the chest and expired in the arms of his Captain.  


The 11th Massachusetts morale is at an all time low. 

Wednesday 13 June 2018

Fort Munroe, the Peninsula 1862


Gen. George B. McClellan’s amphibious invasion of the Virginia Peninsula in March and April 1862 involved one of the great logistical achievements of the Civil War. By April 2 he had amassed 58,000 men, 15,000 horses and mules, 1,100 wagons and 44 batteries, along with extensive supplies and telegraph wire — and more troops were on the way.

But McClellan did not appreciate the land of the Peninsula, particularly the sandy roads that quickly turned to mud when heavy rains fell in early April. These conditions were worsened by his reliance on a map drawn for the invasion that was horribly flawed. The map had been drawn under the direction of Maj. Gen. John Wool, commander of the Department of Virginia and in charge of the Union-held Fort Monroe at the tip of the Peninsula.

There seems to be a great deal of scope for a series of small Sharp Practice games linked into a campaign set on the peninsula.  I set to on an A3 sheet and drew an approximation of the terrain I wanted.  Please don`t take my map as being overly accurate or you will have problems similar to those of General McClellan!   

The Union will start at Fort Munroe, initially as part of the garrison, trying to get information prior to General McClellan's invasion. 

The Confederates are holding the line above the Warwick river, however in the campaign they too will be sending out individual companies to probe south towards the fort.  This will keep the Yankees from learning about their defences along the Warwick River. 

Between these will be civilians, and because this is Virginia their loyalties will be biased towards the South.  Fort Munroe was also the location many escaping slaves made for.  I`ve used names from "Gone with the Wind" for these and the Union will gain additional victory points for liberating slaves.  Any slaves encountered will be fiercely pro Union.


Overall the Confederates will be trying to prevent the Union getting more information on the Peninsula.  They will be randomly generated as part of the game and I intend to play the Union side against the programmed Rebs...

Historically the invading troops set out from Fort Monroe on April 4th, marching about 10 miles before camping at Big Bethel. The plan was to reach Warwick Court House the next day, and then on to Halfway House in order to attack Yorktown from the northwest. 

But the map misled them. When the forces awoke the next day, they faced not just a driving rain, but also a river where it should not have been. Moreover, the Confederate Gen. John Magruder had entrenched his forces on the northern side of the Warwick, and had engineered dams that created ponds and marshes on the south side. All of this made a mess of McClellan’s offensive, and turned plans for an attack on Yorktown into a month-long siege. 

My Union troops will have to opportunity to turn this around, and properly reconnoiter the position... if they can get past the Confederates.  They will begin on March 15th as the Union Forces begin to mass around the Fort.


The top bit of the map.  Won`t be seeing this area for some time!

Campaign Action Table 
(take a 2D6 twice per day) 

2   The rebels play a nasty trick
3   A Spy is revealed
4   Interaction with a character
5   Scenario 1  An Encounter  Battle
6   Interaction with a character
7   Scenario 2  Sweep the Table  Mission
8   The Weather Turns
9   Scenario 3  Defence in Depth  Battle
10 Scenario 4  Escort Duty  Mission
11  Scenario 5  Attack an Objective  Battle
12  Scenario 6  Rescue Mission  Mission

Characters and Locations

Hampton and the Fort
1. Miss Daisy
2. Mrs Kornblow
3. Uncle Peter, an escaping slave
4. Dimwit Van Troomp 
5. Eustace the chicken wrangler
6. Mayor J. D Hawg

North of Hampton and the Back River area
1.  Miss Belle
2. Mrs Van Troomp, running away from her husband
3. Slim, the overweight mailman
4. Preacher Welby
5. Prissy, an escaping slave
6. Roscoe, dirt farmer


The James River Road
1.  Miss Scarlett, with a revolver
2. Mrs Firefly, looking for her drunken husband
3. Rufus T. Firefly, with a bottle of bourbon
4. The Duke boys, cropping an old cottonwood
5.  Mr Rhett Gable, Southern gambler
6.  Otis P. Driftwood, whiskey drummer

The Poquoson River area
1.  Grandma Wilkes, on her old mule
2. Old Dr Meade
3. Aunt Hamilton
4. Big Sam, a slave who wants to escape
5. Mammy, an escaping slave
6. Billy Bob, banjo playing poor.


The 7th Virginia 
11th Massachusetts


CONFEDERATES, 1862
Leader, Status III 
Three Groups of 8 Infantry, Rifled Muskets 
Leader, Status II 
Two Group of 8 Infantry, Rifled Muskets 
Leader, Status I 
One Group of 6 Skirmishers, Rifled Muskets 
Leader, Status I 
One Group of 6 Skirmishers, Rifled Muskets 
Point Value 1862:  83 

EARLY UNION, 1861‐62  
Leader, Status II 
Three Groups of 8 Infantry, Rifled Muskets 
Leader, Status I 
Two Group of  8 Infantry, Rifled Muskets 
Leader, Status I 
One Group of 6 Skirmishers, Rifled Muskets 
Point Value:  53 

Game One.

March 15th - Major Quilp takes the 1st company of the 11th Massachusetts regiment along the coast road towards Hook point.  By 0900 hrs he cuts across country towards Baxter's farmstead.  At 1100 the company are on the North road and encounter "Uncle Peter" an escaped slave with a game leg, origins unclear, who is pro Union and provides information.  The Confederates are at the Crossroads further north. (Please note that the map is rotated, so any compass references are fudged at best.  Then again the historical map was rubbish too!)

Quilp's Yankees cut across country, avoiding the road and reach the Webster Farm.  Their Deployment point is almost centre table.  The Confederates are advancing from the North west.  The Rebel deployment point is on the road entering on their far right flank table edge.

There will be two Civilians on table.  One is Farmer Webster, who according to my "Character of a man" table has has "a thick country accent," consarn it!

The second civilian will be "Uncle Peter," who despite his game leg has guided the Union Company here.  

Union Force Morale is 9
Confederate Force Morale is 11

Both sides will use three leaders:

11th Massachusetts
Major Quilp
Captain Titball
Sergeant Butt
5 Regular Groups, 1 Skirmish Group

7th Virginia
Captain Pickle
Lt. Bacon
Sergeant Lester
5 Regular Groups, 2 Skirmish Groups

The Game

Using the maps in Terrible Swift Sword as a guide I devised the terrain I wanted.  The campaign map provides a base line here, and it wasn`t until much later that I realised I`d missed a farm building out.  I`ll  have to get one of the Perry barns and maybe a church sorted out for future games.
The battlefield 


Johnny comes marching home... The Yankees arrive, skirmishers leading.
I wish I was in Dixie... actually the game is set in Dixie...  The Rebs arrive, their skirmishers quickly taking up a good position in the woods 

Captain Dill Pickle, with his ever present "White Folks Bible"


First blood to the Rebel skirmishers, who drive the Union boys back. 

Lieutenant Chris P. Bacon with yet more Confederates moves out onto the flank.

Sergeant Butt is killed, shot in the butt perhaps?  It's the end of the Union Skirmishers


Captain Titball prepares to meet the Rebs, whilst Big Tom wonders if this was a wise idea.


Captain Pickle leads his column around onto the Yankee flank. Farmer Webster favours the South, and reveals the Union Deployment point.
Major Quilp leads his boys out onto the flank, confronting Pickle.  In a tremendous exchange of fire the Union shoot high, missing most of those Southern boys.


Captain Pickle aims low, and the Confederate volley at this range is devastating.


Quilp falls with a musket ball through the chest.


The Rebel yell!  Captain Pickle leads the Confederates in a charge.

Confederate Sergeant Moe Lester and his skirmishers snipe at the Union from the centre position


With less than half the original Yankee Company left on table Captain Titball leads his men in a swift retreat, lead by Big Tom!  
Titball is the only Union Officer to survive.  

A convincing win for the Confederates, for the loss of only five men.  Captain Titball has his work cut out if the Union are to make any headway in this campaign...