Monday 25 December 2023

Burning Scratchy Bottom

 Blood and Crowns

Once again using my WOTR figures.


Sir Hugo and his Company advance on Scratchy Bottom, unaware of the Sherrif's men moving from Cold Keep.

Sir Hugo's forces.  Turns out I have a lot of Wars of the Roses figures.

With the village to my front I advance.  

Opposite the enemy come on.  Big forces!

The Yorkists pushc their bows forwards

And as the lines close I go into interpreting the rules mode and forget to take more pictures.

Unfortunately I must report a loss for Sir Hugo, and his retirement from the field towards Ballsup Tower.

A nice little mini campaign that I'll have to repeat.


East Africa 1914

Whilst seasoned Indian Army troops were sent to more important battlefields in WW1 a ragtag group of Imperial Service units, raised by local Indian Magnates and Potentates was sent out to Mombasa, with the intention of protecting British East Africa from the German colony to its South.  

The first to land, the 29th Punjabis were already on a train bound for Voi accompanied by a 12-pdr naval gun from HMS Fox by 6th September. A half battalion (4 companies) of each of the Jhind, Bharatpur, Kapurthala, Kalabar (single company) and Rampur Imperial Service Troops – the armed forces of independent Indian potentates – a Volunteer Maxim Gun Company, the Calcutta Field Battery and the 27th Mountain Battery followed, and by mid September they had been ordered to take up positions protecting the Uganda Railway

History records very little of the War Service of the "Kalabar Imperial Service Company" shipped to the colony early in 1914.   Serving under Captain Valentine Keen, who had married the daughter of the former Khasi the company boasted 200 Sepoys.  Serving with Keen was the Young Khazi as his 2nd Lt and adjutant.  

Keen was tasked to support Major Selous Parker of 3 King's African Rifles, since his Mountain trained Infantry were new to the African Bush.

(Note that the participation, and indeed very existence, of the Kalabar Company is in fact only recorded in the papers of controversial historian and alien apologist Prof Augustus P Farthingdale of the University of North Dyrham.  His work has been Pooh-pooh-ed by serious historians.)

Elements of 3 KAR

The encounters at the beginning of the war saw German demolition teams attempting to break through to the railway.  They would typically consist of A few white colonists 20 or so Askaris and perhaps an Mg team if an ambush was planned.  British counter measures to these saw infantry encampments scattered along the Uganda railway in unhealthy and frankly dangerous locations, as well as aggressive patrols amoured trains. 

My first "tester" game will use a combination of "Patrols in The Sudan" terrain rules and "Blood and Valour" WW1 rules, with a German raiding patrol attempting to reach the railway line.

The Forces.

150 points

BRITISH EAST AFRICA UNITS:

British Lieutenant Command Team:

BRITISH LIEUTENANT  (COMMANDER) Shoot Close  Combat Shoot  Save Close   Combat Save Resolve Cost Initiative Command  Range Command  Points 6 6 5 7 6 0 2 8” 1 UNIT COMPOSITION: 1 Commander, 2 Riflemen SPECIAL RULES: Assault Experts WEAPONS: 1 Pistol (Commander), 2 Rifles


British European or Colonial Riflemen Units:

These units represent the troops sent from the British Isles, India, and South Africa.   


BRITISH RIFLEMEN (CORE) 

Shoot 6, Close Combat 6,  Shoot Save 6, Close Combat Save 7,  Resolve 6,  Cost @16 Initiative 3.  UNIT COMPOSITION: 4 Riflemen (add models for 4pts. each, max 12 models in unit) SPECIAL RULES: Assault Experts WEAPONS: Rifles 5pts. – Add Grenades to entire unit 8pts. – Add a Light Machine Gun model to this unit (max 12 models in unit) 

BRITISH KING’S AFRICAN RIFLES (CORE) 

Shoot 7, Close Combat 6,  Shoot Save 6, Close Combat Save 6,  Resolve 5,  Cost @16 Initiative 2.  UNIT COMPOSITION: 4 Riflemen (add models for 4pts. each, max 12 models in unit) SPECIAL RULES: Blood Curdling Charge WEAPONS: Rifles


GERMAN EAST AFRICAN 

COMMAND TEAM:

German Leutnant Command Team:  

GERMAN LEUTNANT  (COMMANDER) Shoot Close  Combat Shoot  Save Close Combat  Save Resolve Cost Initiative Command  Range  Command  Point 6 6 5 7 6 0 2 8” 1 UNIT COMPOSITION: 1 Commander, 2 Riflemen SPECIAL RULES: True Grit WEAPONS: 1 Pistol (Commander), 2 Rifles


CORE UNITS:

German Schutztruppe Riflemen Units:

The Schutztruppe was made up of European Germans who lived in Africa for many years.  GERMAN SCHUTZTRUPPE  (CORE) Shoot Close Combat Shoot Save Close Combat Save Resolve Cost Initiative 5 6 6 7 5 20 3 UNIT COMPOSITION: 4 Riflemen (add models for 5pts. each, max 12 models in unit) SPECIAL RULES: True Grit WEAPONS: Rifles 8pts. – Add a Light Machine Gun model to this unit (max 12 models in unit) 

German Askari Riflemen Units:  The Germans built up a strong force of native Africans to help them fight during the campaigns in eastern Africa. These units performed much better than their counterparts that fought for the British. While they were equipped with very poor rifles during the war they excelled in close combat.  

ASKARI RIFLEMEN (CORE) Shoot Close Combat Shoot Save Close Combat Save Resolve Cost Initiative 7 6 6 6 5 16 2 UNIT COMPOSITION: 4 Riflemen (add models for 4pts. each, max 12 models in unit) SPECIAL RULES: True Grit, Blood Curdling Charge WEAPONS: Rifles


German Heavy Machine Gun Team:

The German Army used the Maxim Machine Gun as their primary mounted machine gun.  GERMAN HEAVY MACHINE  GUN TEAM (SUPPORT) Shoot Close Combat Shoot Save Close Combat Save Resolve Cost Initiative 6 6 6 7 6 20 1 UNIT COMPOSITION: 3 Soldiers, 1 Machine Gun SPECIAL RULES: WEAPONS: 1 Heavy Machine Gun


My East German Force.  Command group, 2 groups of Askaris, a group of Colonial German Infantry and a heavy MG. Scouting ahead are a group of Ruga-Ruga, probably former slavers.


The Game.


The Indian Army deploy three terrain pieces.  Its a raid so their camp will be the ninth piece.  The German column advances on behind its scouts.

Two terrain pieces are scouted but the dead ground ahead is a possible ambush location.

Tribal Auxiliaries pop up in the dead ground.  Scouts for the British.  They will fire once and then attempt to vanish back into the terrain.  I allow them a shot out if touching the edge of dead ground.  This however means that they can be seen.

Leutnant Maximilian von Spittle, Feld -Compagnie Officer.

The Ruga Ruga lose men to a ragged volley.


The German Colonials shooting is fair...

Using the dead ground as cover 

I get the mountain gun ranged in

The Indians move forwards

German Askaris begin to take casualties

The Indians storm the rocks.

And the Askaris can't handle it

My German Officer attempts to stem the tide.

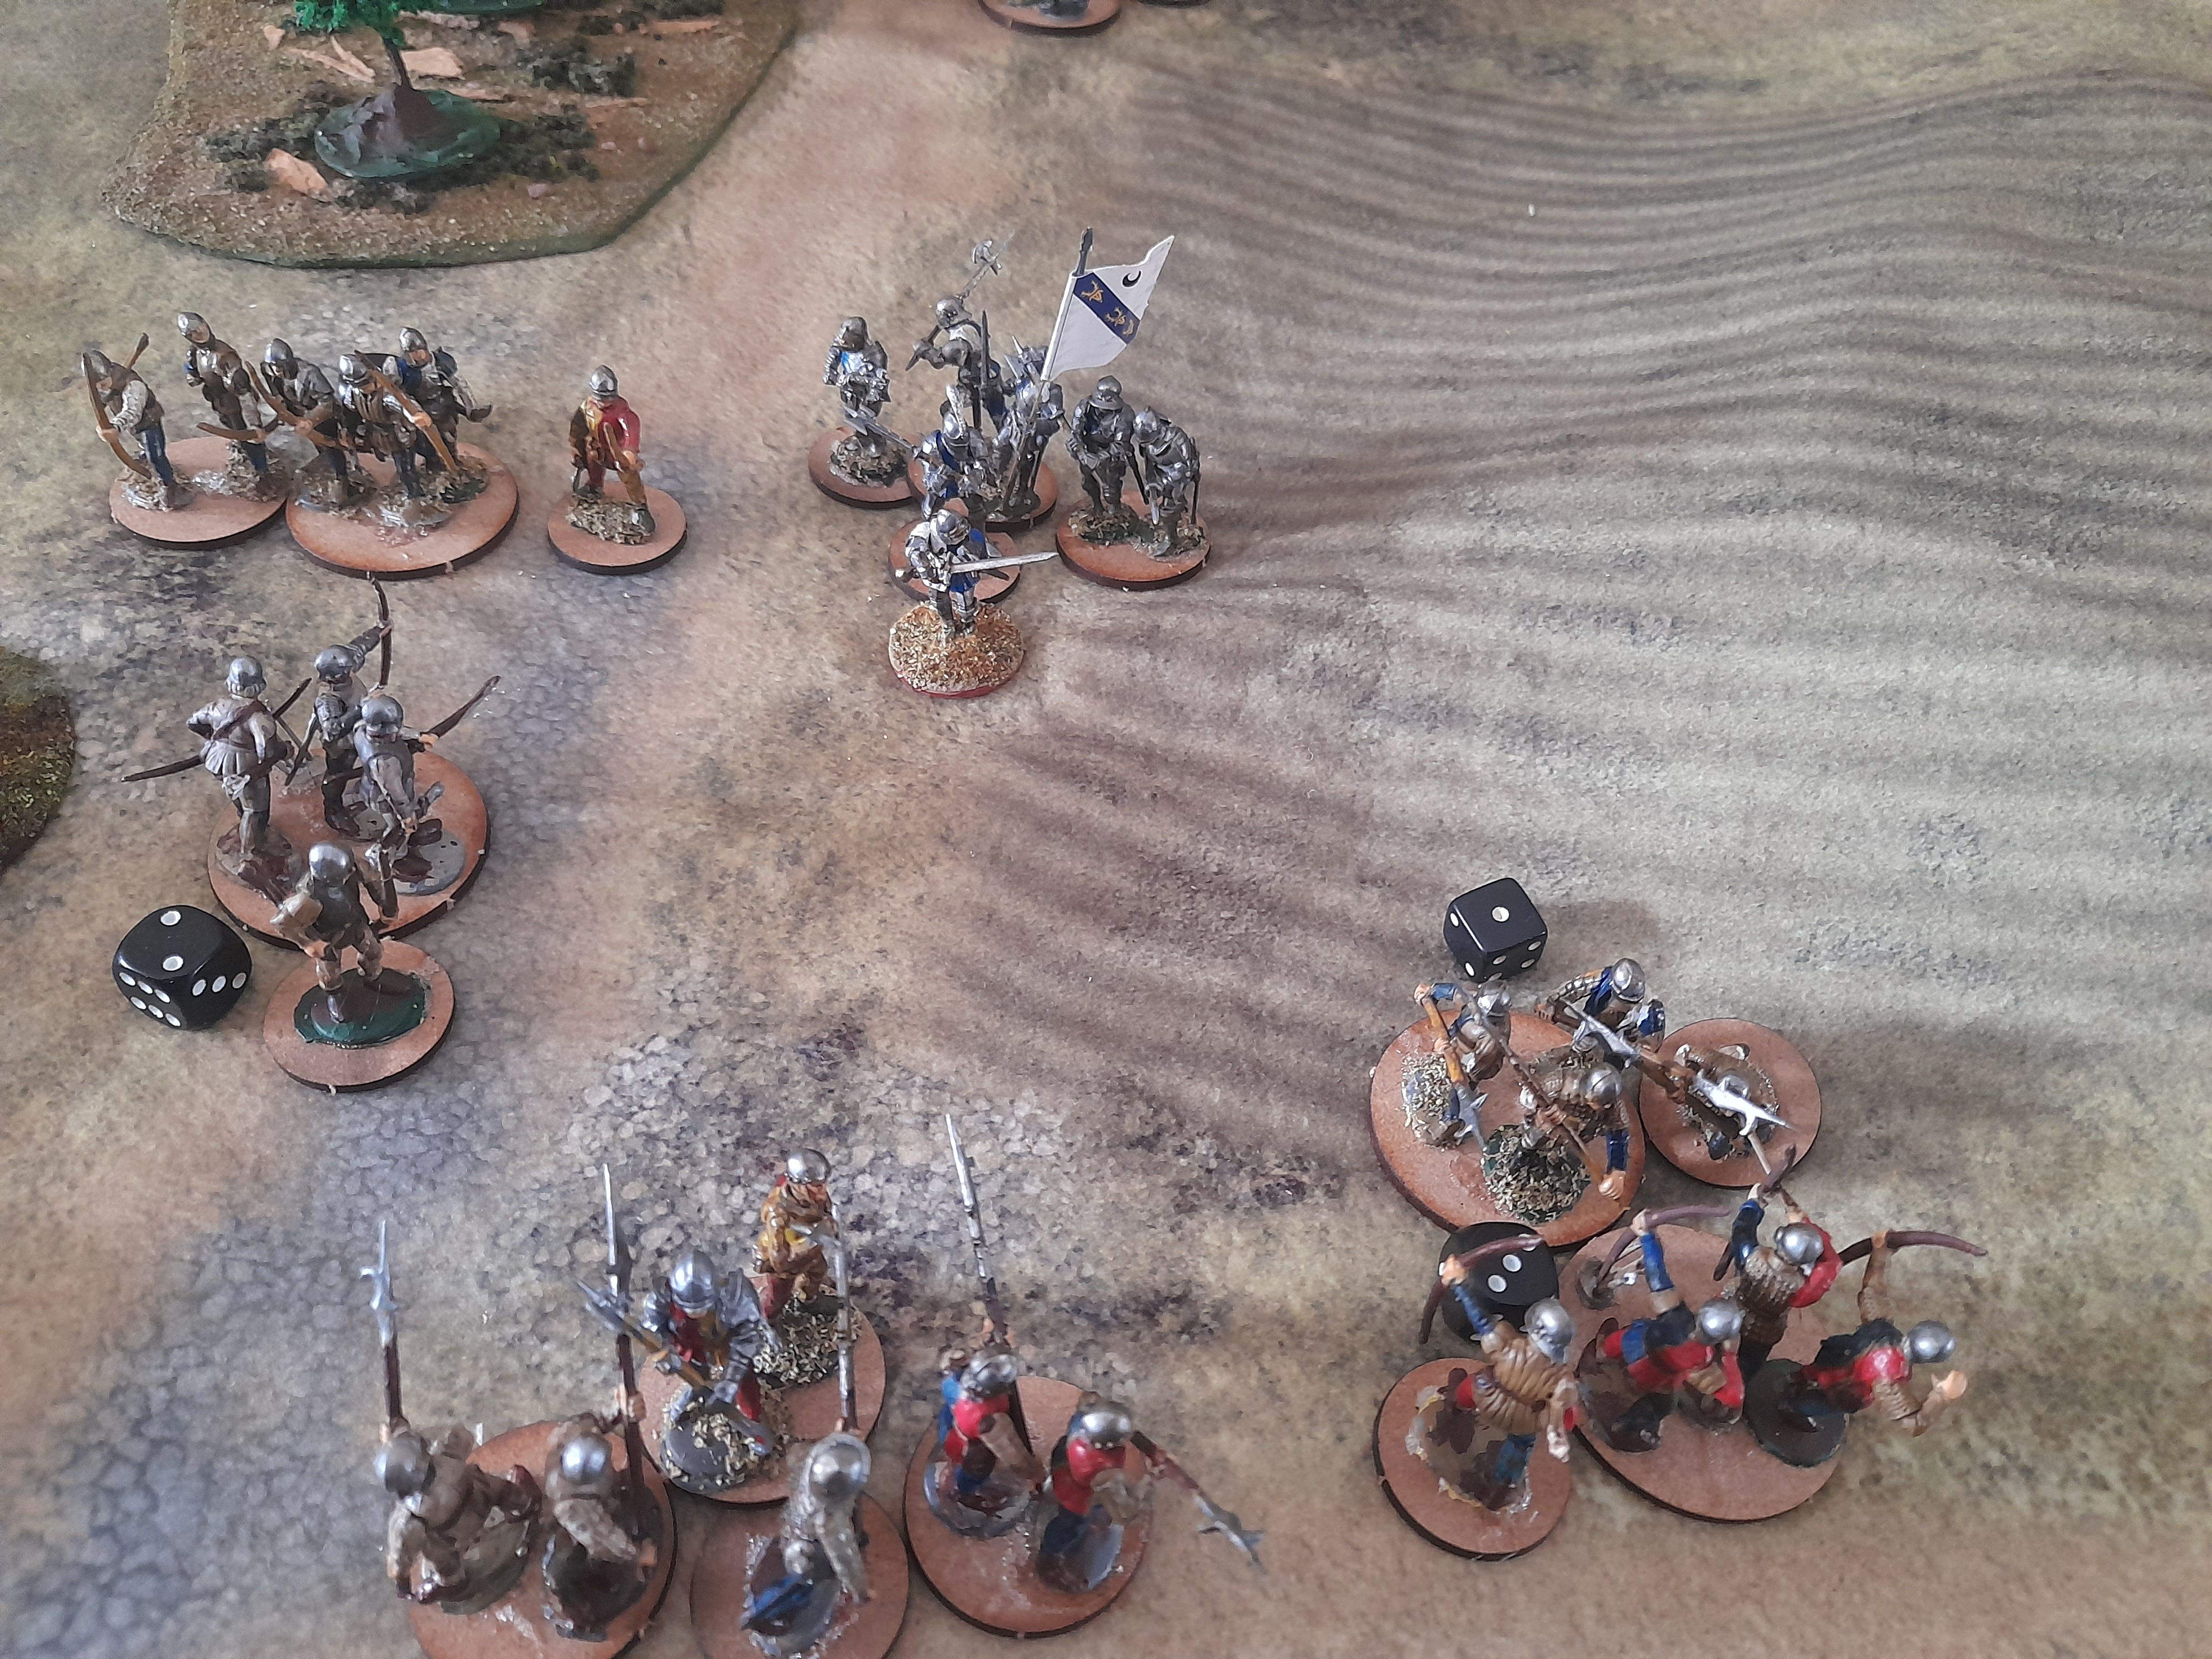
But the Indians have taken the flank.

The end game.  More East Africa to come I think.


Wednesday 15 November 2023

The Ambuscade at Pratt's Bottom

 "A histore of divers warrs and right owlde bovver in Ye  County of Midshire."

A first try of Blood and Crowns.

It is July 1456 and once again Lord Farthingdale has refused to pay his taxes to the Earl of Midshire.  Fearing that the Earl is supporting the Pretender, the Duke of York, his former Excellency declared for the Lancastrian King and gathered his retinue and tenants at Potter's Knob.  

The Earl has sent his henchman, FitzQuilp, the Sheriff of Much Rutting, a twisted hunchback peasant of a fellow, a vile strutting hairy imp.  A man who smelled of turnips ... Well you get the idea.

The Earl's lackey Sheriff FitzQuilp has gathered his forces and advanced to cross the River Tickle, and set ambuscade at Pratt's Bottom determined to put an end to the Lancastrians.


Dramatis Persona
Avery Oddman, Earl of Midshire
Squire FitzQuilp - the twisted crookback, Sheriff Of Much Rutting, obsessive tile collector 
Lord Hugo de Farthingdale, an Obese individual Without Honour! 
Sir Quincy de Whitemoore an insane aristocrat, and his poltroon brother Sir Oliver.

Midshire.  Avalon Hill's Robin Hood is the basis of the map.


Sir Hugo

Vanguard

Two Groups of trained archers

Main body

One group of trained billmen

One group of trained Men at Arms afoot.

Reserve

One group of Veteran Men at Arms afoot


Ambuscade Objective Markers:  None Scenario Rule:  Escape!: Defending units escape and are  not considered eliminated if they intentionally leave the table by having all models  within 3”  of an Escape Edge and performing  a Move action. Defending units do not Fall  Back towards a table edge or deployment  zone and instead move toward the center  of the Objective Area.

Deployment:  Attacker chooses two deployment zones  and may place units in either of these deployment zones. The defender may place  their units in the Objective Area. Starting  with the attacker, players alternate placing  units until all units are deployed.

Additional Feats of Arms:  Starting on Turn 6, during the End Phase:

» Attacker gains +1 Renown for each enemy unit within the Objective Area.

» Defender gains +1 Renown for each unit  that is no longer within the Objective Area  and is not Shaken or Engaged.


Determine Scenario by rolling 1d10:

1)  Ambuscade 2)  Seize 3)  Pillage 4)  Burn 5)  Rearguard 6)  Regicide 7)  Formal Combat  8)  King of the Hill 9)  Defender’s Choice 10)  Attacker’s Choice


The Game

I have Sir Hugo three units, a bow bill and Men at arms.  It's a rules tester game after all.  The enemy mirrored this, with an additional bow group.

Surrounded.  The Lancastrians attempt to break out.

A heroic charge by the Lancastrians billmen.  They only get near because the shooting was dire.

And the Lancastrian bowman knock down their opposite numbers.

Sir Hugo begins to fight clear.

Sir Hugo leads the charge.

The Men at Arms go through the bills throwing them back.  The Lancastrians are heading up table.

Game over.  The Yorkist Men at Arms don't reach the fight as the Lancastrians escape the ambuscade.


Friday 27 October 2023

Some Colonial conversions

Some Colonial conversion.

Building the Queens Own Loyal North Lancashire Fusiliers, a fictional Colonial era Regiment started me on a kit bashing journey.  I like the fact that the Perry Afghan War plastics are more slender in proportion than some other figures available, and I noticed that it would be possible to swap some heads around to deliver different units to my tabletop.

The source material

Main sprue with five figures.

Warlord Games version with four figures.  More chunky but two are usefully kneeling.


The Perry main sprue carries turbans to convert the figures into Indian Army troops, as well as loads of different pith helmet options.  I went for the straight up Afghan War versions for mine.
Following that I went off piste!

I don't want to break the copyright of Osprey publishing and show my evidence, but essentially for me the webbing on these Perry's figures is more or less the same as that on the WW1 Ottoman Turk illustrations.  Given that there was a huge variation in uniforms anyway I felt justified in getting some Gripping Beast Enver Pasha helmet heads and giving it a go.  Bingo, just the look.  My Copplestone metal Ottomans differ, but uniform supplies for my platoon must have been pretty ad hoc because they look OK to me.
Most of my Ottoman platoon, still in the paint queue.

The figure on the left is my conversion, the right hand figure is a Copplestone castings miniature.  I like them both but I think the slimmer figure is my preference.

Rear view.  I have illustrations of Ottoman troops wearing very similar webbing.  I like the long thin bayonet too.


On to the Egyptians circa 1884 for the Sudan.  Very expensive to source in 28mm.  I would have preferred full length trousers but will work with the puttees. Some illustrations show bloused trousers with gaiters.  I'll go with it.  

The bigger headed figure on the right has a Gripping beast bonce.  The other has a head from the Mahdist sprue with a taller fez.

Better picture.  Once I get the shader on them my terrible close up painting will not be so obvious.  I'm planning 40 of these guys to take on my Mahdists in a Sharpe Practice campaign.  Just need to collect some rude names for my officers.  


The webbing is shown as very dark or even black, I've gone with army painter hardened leather.

A couple of boxes of these Perry's set me back £40, but on the plus side they have delivered me three different forces at a fraction of the price from buying the metals.  Just got to paint them now!


Boer War Scenarios

 Scenarios

I like the "objectives" idea in Blood and Steel but also feel it needs some scenarios that reflect the theatre  of operations.  I'll detail these as I game them.

1.  The Armoured Train

2.  The Blockhouse

3.  Piet's farm

4.  The drift

5.  The Kopje

6.  The Veldt

A quick Blood and Steel game.
This was Piets farm and I used my Zulu Kraal to represent it.
The farm goes into a table corner.  Boer women and children are reported to have laid tables of food to tempt Imperial patrols into an ambush.  
The Boer have one hidden unit and another three at a table edge adjacent to the farm.   

The objective, "liberate" the farm.

Boer firepower, three down.  2nd Lt Eustace Cummings and his Company are dumbfounded!

And the Imperials single hit fives does exactly nothing as the Boer shelter in the depression and save it.

This is towards the end of the game as the Boer volley from the tall grass.  Yet another loss for the Queens Own Loyal North Lancs'


Patrols on the Veldt

Peter Pig's Patrols in the Sudan with a simple adaptation for the Boer War.

The Imperial column advances on.  Its the Queens Own North Lancs.  My Natal scouts scatter to get a look into the terrain.

This is later in the game.  The native huts are my objective.  I've cleared and scouted five terrain pieces, but the Boer have taken a toll.  I switched the Blood and Steel mechanisms about half way in.

The Lancs are among the tall grass, and surrounded.  

And essentially the same shot as I lose to the Boer rifles.

The Imperials lost two groups, but somehow saved their scouts.  

Need to look at randomly generating the Boer appearances.

I've gone for 3, 2, 1 basing and Perry Plastics for the Imperials.  The Boer are Perry metals.  Not a great performance but an enjoyable solo game.  I will be considering raising a Mounted Infantry company to take on these Boer.


Friday 13 October 2023

Blood and Steel, the Boer War

The 2nd Anglo Boer War broke out in 1899, after the failure of the Bloemfontein Conference when Boer irregulars and militia attacked colonial settlements in nearby British colonies. Starting in October 1899, the Boers placed Ladysmith, Kimberley, and Mafeking under siege, and won a string of victories at Colenso, Magersfontein and Stormberg. In response to these developments, increased numbers of British Army soldiers were brought to Southern Africa, and mounted largely unsuccessful attacks against the Boers.

In response to the mobility of the Boer the British maximised their own use of mounted forces, and this the North Durham Yeomanry were brought up to strength and shipped to the Cape, being subsequently deployed in "bandit country" 

My games will focus on those legendary enemies Kommandant Quincy Van Trompe and 2nd Lieutenant Herbert Farthingdale.  


Its January 1899.  A British Expeditionary force under General Buller is intent on marching straight up the railway line to relieve the siege at  Ladysmith.  The North Durhams have sent out the Yeomanry along the Tugela river.  I expect some skirmishing.

Table needs some work!

BRITISH FORCES

MARK YOUR TARGETS!: Each British Regulars unit does not take Fatigue to perform its first Defensive Fire each turn.

Lieutenant Leader 0 Pts
Repeater Pistol Move 4”
Cmd. Range 8” Cmd. Pts. 1
TRUE GRIT: May reroll failed Melee Save results.
SHOOT  6 (10”)
MELEE   6
SHOOT/SAVE   5
MELEE/SAVE  7
RESOLVE  5
INITIATIVE. 1
A typical British Junior Officer. 

North Durham Yeomanry, 
Mounted Infantry. 7pts

Repeater Rifle Move 4”
CAVALRY - Free advance.
TRUE GRIT: May reroll failed Melee Save results.
SHOOT  7/6 Unlimited
MELEE   6
SHOOT/SAVE   7/6
MELEE/SAVE  6/7
RESOLVE  5

UPGRADES
NCO UPGRADE 5 PTS.
Designate a single model to be a Non-Commissioned Officer (NCO).
The NCO’s unit counts as being in command range as long as this model is still part of it.
A In Formation with an NCO gains a -1 bonus to its Resolve.
The NCO can maximise the Leaders command by taking control of a unit.

MUSICIAN UPGRADE 10 PTS.
Add a single model to the Leader unit to act as a Musician.
The Leader’s command range is doubled while this model is part of the unit.
Armed as modeled.
Extends a Leader's Command effectiveness over the noise of Battle.

The North Durhams
Lt Herbert Farthingdale. @0
Sergeant Proudpole @5
1st Troop 8 men. @56
2nd Troop 7 men @49
3rd Troop  7 men @49
Royal Yeomanry Artillery.  15pdr.  @30

 The Boer 


Mounted Infantry. 6pts
ABL Rifle Move 4”
CAVALRY - Free advance.
Ruthless
SHOOT  7/6 Unlimited
MELEE   7
SHOOT/SAVE   7/6
MELEE/SAVE  6/7
RESOLVE  6

Veteran Burghers, upgrade to Marksmen @1pt.  Upgrade to Mauser Repeater @ 1pt

Kommandant. @15
LEADER 15 PTS.
Repeater Rifke Move 4”
Cmd. Range 8” Cmd. Pts. 2
TRUE GRIT: May reroll failed Melee Save results.
SHOOT  7/6 Unlimited
MELEE   6
SHOOT/SAVE   7/6
MELEE/SAVE  6/7
RESOLVE  5

Kornet (as NCO) @5

The Boer
Kommandant van Trompe @15
Kornet van Satchmoe. @5
1st Groep.  6 men the burghers, upgraded.  @48
2nd Groep. 6 men, the veterans upgraded @48
3rd Groep  6 men, the old fellas, upgraded @48
4th Groep  6 men, the boys, not upgraded @36

Scenarios
I like the "objectives" idea in Blood and Steel but also feel it needs some scenarios that reflect the theatre  of operations.

1.  The Armoured Train

2.  The Blockhouse

3.  Piet's farm

4.  The drift

5.  The Kopje

6.  The Veldt


Additional Actions

Rapid Fire
Empties the units magazines in a "mad minute." The group may aim and fire twice in succession for two initiatives during this turn.  Each Rifle armed British unit may order this once per game.  The Mauser armed Boer may use this for the whole game.

Because of the differences between the Lee Enfield /Lee Metford rifles used by the Imperials and the Mauser many of the Boer used the latter seem to have had a much higher rate of fire.  The Lee rifles reloaded cartridges singly into the magazine, the Kaiser used a clip.