Friday 27 October 2023

Some Colonial conversions

Some Colonial conversion.

Building the Queens Own Loyal North Lancashire Fusiliers, a fictional Colonial era Regiment started me on a kit bashing journey.  I like the fact that the Perry Afghan War plastics are more slender in proportion than some other figures available, and I noticed that it would be possible to swap some heads around to deliver different units to my tabletop.

The source material

Main sprue with five figures.

Warlord Games version with four figures.  More chunky but two are usefully kneeling.


The Perry main sprue carries turbans to convert the figures into Indian Army troops, as well as loads of different pith helmet options.  I went for the straight up Afghan War versions for mine.
Following that I went off piste!

I don't want to break the copyright of Osprey publishing and show my evidence, but essentially for me the webbing on these Perry's figures is more or less the same as that on the WW1 Ottoman Turk illustrations.  Given that there was a huge variation in uniforms anyway I felt justified in getting some Gripping Beast Enver Pasha helmet heads and giving it a go.  Bingo, just the look.  My Copplestone metal Ottomans differ, but uniform supplies for my platoon must have been pretty ad hoc because they look OK to me.
Most of my Ottoman platoon, still in the paint queue.

The figure on the left is my conversion, the right hand figure is a Copplestone castings miniature.  I like them both but I think the slimmer figure is my preference.

Rear view.  I have illustrations of Ottoman troops wearing very similar webbing.  I like the long thin bayonet too.


On to the Egyptians circa 1884 for the Sudan.  Very expensive to source in 28mm.  I would have preferred full length trousers but will work with the puttees. Some illustrations show bloused trousers with gaiters.  I'll go with it.  

The bigger headed figure on the right has a Gripping beast bonce.  The other has a head from the Mahdist sprue with a taller fez.

Better picture.  Once I get the shader on them my terrible close up painting will not be so obvious.  I'm planning 40 of these guys to take on my Mahdists in a Sharpe Practice campaign.  Just need to collect some rude names for my officers.  


The webbing is shown as very dark or even black, I've gone with army painter hardened leather.

A couple of boxes of these Perry's set me back £40, but on the plus side they have delivered me three different forces at a fraction of the price from buying the metals.  Just got to paint them now!


Boer War Scenarios

 Scenarios

I like the "objectives" idea in Blood and Steel but also feel it needs some scenarios that reflect the theatre  of operations.  I'll detail these as I game them.

1.  The Armoured Train

2.  The Blockhouse

3.  Piet's farm

4.  The drift

5.  The Kopje

6.  The Veldt

A quick Blood and Steel game.
This was Piets farm and I used my Zulu Kraal to represent it.
The farm goes into a table corner.  Boer women and children are reported to have laid tables of food to tempt Imperial patrols into an ambush.  
The Boer have one hidden unit and another three at a table edge adjacent to the farm.   

The objective, "liberate" the farm.

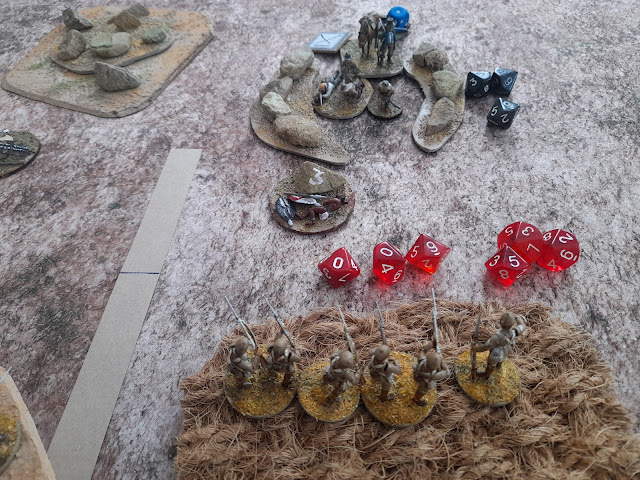
Boer firepower, three down.  2nd Lt Eustace Cummings and his Company are dumbfounded!

And the Imperials single hit fives does exactly nothing as the Boer shelter in the depression and save it.

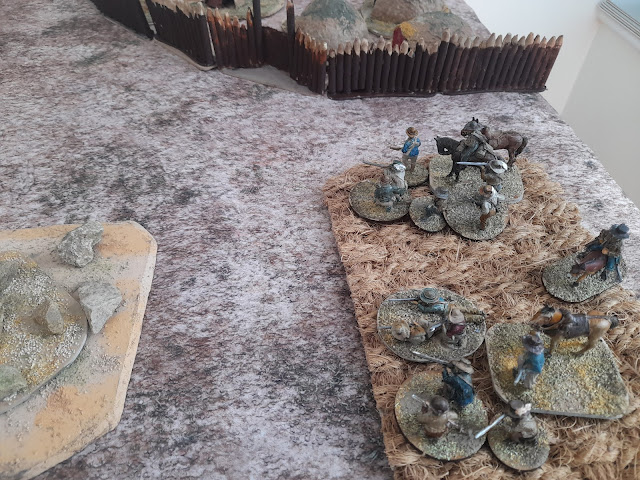
This is towards the end of the game as the Boer volley from the tall grass.  Yet another loss for the Queens Own Loyal North Lancs'


Patrols on the Veldt

Peter Pig's Patrols in the Sudan with a simple adaptation for the Boer War.

The Imperial column advances on.  Its the Queens Own North Lancs.  My Natal scouts scatter to get a look into the terrain.

This is later in the game.  The native huts are my objective.  I've cleared and scouted five terrain pieces, but the Boer have taken a toll.  I switched the Blood and Steel mechanisms about half way in.

The Lancs are among the tall grass, and surrounded.  

And essentially the same shot as I lose to the Boer rifles.

The Imperials lost two groups, but somehow saved their scouts.  

Need to look at randomly generating the Boer appearances.

I've gone for 3, 2, 1 basing and Perry Plastics for the Imperials.  The Boer are Perry metals.  Not a great performance but an enjoyable solo game.  I will be considering raising a Mounted Infantry company to take on these Boer.


Friday 13 October 2023

Blood and Steel, the Boer War

The 2nd Anglo Boer War broke out in 1899, after the failure of the Bloemfontein Conference when Boer irregulars and militia attacked colonial settlements in nearby British colonies. Starting in October 1899, the Boers placed Ladysmith, Kimberley, and Mafeking under siege, and won a string of victories at Colenso, Magersfontein and Stormberg. In response to these developments, increased numbers of British Army soldiers were brought to Southern Africa, and mounted largely unsuccessful attacks against the Boers.

In response to the mobility of the Boer the British maximised their own use of mounted forces, and this the North Durham Yeomanry were brought up to strength and shipped to the Cape, being subsequently deployed in "bandit country" 

My games will focus on those legendary enemies Kommandant Quincy Van Trompe and 2nd Lieutenant Herbert Farthingdale.  


Its January 1899.  A British Expeditionary force under General Buller is intent on marching straight up the railway line to relieve the siege at  Ladysmith.  The North Durhams have sent out the Yeomanry along the Tugela river.  I expect some skirmishing.

Table needs some work!

BRITISH FORCES

MARK YOUR TARGETS!: Each British Regulars unit does not take Fatigue to perform its first Defensive Fire each turn.

Lieutenant Leader 0 Pts
Repeater Pistol Move 4”
Cmd. Range 8” Cmd. Pts. 1
TRUE GRIT: May reroll failed Melee Save results.
SHOOT  6 (10”)
MELEE   6
SHOOT/SAVE   5
MELEE/SAVE  7
RESOLVE  5
INITIATIVE. 1
A typical British Junior Officer. 

North Durham Yeomanry, 
Mounted Infantry. 7pts

Repeater Rifle Move 4”
CAVALRY - Free advance.
TRUE GRIT: May reroll failed Melee Save results.
SHOOT  7/6 Unlimited
MELEE   6
SHOOT/SAVE   7/6
MELEE/SAVE  6/7
RESOLVE  5

UPGRADES
NCO UPGRADE 5 PTS.
Designate a single model to be a Non-Commissioned Officer (NCO).
The NCO’s unit counts as being in command range as long as this model is still part of it.
A In Formation with an NCO gains a -1 bonus to its Resolve.
The NCO can maximise the Leaders command by taking control of a unit.

MUSICIAN UPGRADE 10 PTS.
Add a single model to the Leader unit to act as a Musician.
The Leader’s command range is doubled while this model is part of the unit.
Armed as modeled.
Extends a Leader's Command effectiveness over the noise of Battle.

The North Durhams
Lt Herbert Farthingdale. @0
Sergeant Proudpole @5
1st Troop 8 men. @56
2nd Troop 7 men @49
3rd Troop  7 men @49
Royal Yeomanry Artillery.  15pdr.  @30

 The Boer 


Mounted Infantry. 6pts
ABL Rifle Move 4”
CAVALRY - Free advance.
Ruthless
SHOOT  7/6 Unlimited
MELEE   7
SHOOT/SAVE   7/6
MELEE/SAVE  6/7
RESOLVE  6

Veteran Burghers, upgrade to Marksmen @1pt.  Upgrade to Mauser Repeater @ 1pt

Kommandant. @15
LEADER 15 PTS.
Repeater Rifke Move 4”
Cmd. Range 8” Cmd. Pts. 2
TRUE GRIT: May reroll failed Melee Save results.
SHOOT  7/6 Unlimited
MELEE   6
SHOOT/SAVE   7/6
MELEE/SAVE  6/7
RESOLVE  5

Kornet (as NCO) @5

The Boer
Kommandant van Trompe @15
Kornet van Satchmoe. @5
1st Groep.  6 men the burghers, upgraded.  @48
2nd Groep. 6 men, the veterans upgraded @48
3rd Groep  6 men, the old fellas, upgraded @48
4th Groep  6 men, the boys, not upgraded @36

Scenarios
I like the "objectives" idea in Blood and Steel but also feel it needs some scenarios that reflect the theatre  of operations.

1.  The Armoured Train

2.  The Blockhouse

3.  Piet's farm

4.  The drift

5.  The Kopje

6.  The Veldt


Additional Actions

Rapid Fire
Empties the units magazines in a "mad minute." The group may aim and fire twice in succession for two initiatives during this turn.  Each Rifle armed British unit may order this once per game.  The Mauser armed Boer may use this for the whole game.

Because of the differences between the Lee Enfield /Lee Metford rifles used by the Imperials and the Mauser many of the Boer used the latter seem to have had a much higher rate of fire.  The Lee rifles reloaded cartridges singly into the magazine, the Kaiser used a clip.


Thursday 12 October 2023

Clancy at the River.

The British had provisioned the fort at Prospect Bluff, with muskets and cannon, just prior to the end of the War of 1812.  Following their withdrawal a group of Native Americans and escaped slaves took up residence.  Its 1817 and Old Andy Jackson is marching South to destroy the fort.  His youngest son, Clancy P. Jackson and the ever ready Sergeant Bigotte are leading the advance with their Company.

Having survived a Seminole ambush where he lost twenty men to the Seminole three,  Clancy needs a victory to impress his daddy and get that promotion to Captain.

The Map

This game is an amalgam of two scenarios, the River Chase and Bridge to Victory.  Clancy has been tasked to capture the bridge, whilst Captain Jebadiah P Hackenbush, of the Militia is escorting the supply rafts.

The Natives' tactics in the last game were hit and run.  If they kill off Clancy and capture the supplies Old Andy Jackson will have a hissy fit.

The terrain

And the baggage is floated downstream


Random entry points for the natives

Clancy comes on in an attempt to save his baggage

Clancy has woodsman on the stream banks keeping pace with the rafts.  But the Natives are beginning to appear.

Clancy gets jumped.

And its hit and run.

Casualties both sides but the Seminole have it.

Clancy supports and the Natives fall back.

More natives charge in.  Clancy is losing men but his supplies get through.
The hero shot, but Chief Buttcrack will be back


Chief Buttcrack, Greater leader @ 15
Little Hump, Minor leader @0
Bignose George, Veteran Seminole hero @5
5 Core Seminole Warriors @6 =30
6 Core Seminole Warriors @6 =36
6 Core Veteran Seminole Warriors @7 =42
6 Support Maroon Seminoles @6 =36
200 points

The Americans


Lieutenant Clancy Hassenfasser Johnson @15
Ensign Peabody @0 (and overpriced at that!)
6 Militia @3 =18
6 Militia @3  =18  (a mix of my Rangers and Canadians)
8 US Army @5 =40  (I use Portuguese Napoleonics as my US Army)
8 US Army @5 =40
8 US Army @5 =40
NCO Sgt Major Quincannon @5
6pdr gun and crew @20
201 points

Terrain

In "The First Seminole War and American Nationhood," Rosen describes the Seminole territory in terms of a frontier wilderness, one Hawthorne or Fenimore Cooper would recognise.  A mix of Swamp and thick woods the everglades were a refuge for "the banditti of runaway slaves” as the Seminole were viewed.

I'm assuming that my existing French Indian War terrain pieces are not a million miles off what I need.

Log cabins
Swamp
Woods
Tracks.
A big ol' gator!


Autumn 2023

Planning for Autumn 2023

Games:

Blood and Crowns
A history of divverrs wars n' bliddy owld bovver in Dyrham, Later Medieval in 28mm. 

Infamy in 28mm.  Titus and Flaccidus against the Celtiberian Warlord Pornographix.  The 28mm Marian Romans are due an outing in Spain, so more Infamy, and my Samnites and Greek cavalry standing in as Spaniards.

18th Century Imaginations in 28mm.  The Baron Pumphosen defends the honour and apricot pies of the Grand Duchy of the Blue.

Si Vis Pacem battlecruiser action in the Mediterranean, Chasing the Goeben, 1914.  


Fivecore Pulp, The Mummy Rises - Lord Randolph Farthingdale and Dr Howard Parker continue their pursuit of the Minions of Vectron, as well as the Tong of Prof Chou En Ginsberg, with the odd Mummy popping up every now and again.  Can pipe smoking Dr P enjoy his rough shag in peace or will it be pistols vs swords again?
I'm also planning a game using the three sergeants and the Cairo Constabulary vs the Cult of the Mummy, Egypt 1884.  Fivecore rules and the "Chaos in Cairo" supplement.

Chain of Command
Ernie and his Bulge, WW2 CoC. The Skyline Drive 20mm. 

WW1 Austrians vs Russians

Some Blood and Valour action using the From Empire to Revolution TFL supplement.  I gamed the first three scenarios already.   I've have added metal command figures from East Front Miniatures to my 20mm HaT Russian and Austrian plastics.

6mm Strength and Honour

The rebase of my 6mm collection, onto 80 by 40, 2mm mdf has gone well.   The invasion of Gaul is on the cards in some quick one off games.

The Wan-King  Rebellion

A 28mm game.  I've been slowly adding different European units for the Legation siege, and have about 50 Boxer Rebellion Chinese to go.  The rules will be Blood and Steel. 


Up Against the Khazi

Again a Blood and Steel outing, with the Rajputs and the West Lancs against the Burpas of the Khyber and the revolting Khazi of Khalabar.  Its been going on for a while now.


Chariot Racing in 6mm

The new 4 horse Assyrian chariots are being rebased as 30 by 30mm for Faustus Furius.  Can Furius Wanke, current champion, hold onto his crown, or is he resting on his laurels?


Proudpole's Navy

Captain Sir James Proudpole will continue his career in innuendo as he pursues a Frenchman in "Proudpole's Horn"


Bumfluff's War, O Group Battleaxe

My Western desert setup has had the Afrika Korps added over the last year.  I just haven't used them yet.  Time for the 11th Hussars and 2nd Lt Bumfluff Farthingdale to take to the tabletop.


The Blade flashes

Still waiting for the Lardies to publish their 17th century skirmish rules, "What a flasher" presumably.  I aim to do a few En Garde games in the meantime.


Assault on Bunker 17

Some retro Laserburn action, spurred on by the polystyrene packing for my freezer which, in an unusual moment of clarity, I identified as strangely similar to the classic "Bunker 17."  Percentage dice ready.


Planned terrain scratch building:

Small three part terrain sections, bog land, 6 inch by 12 inch river sections. Celtic round huts.  Woven fences.

Also that polystyrene Bunker for Laserburn!

Sunday 8 October 2023

Preparing for Blood and Crowns

My 100 Years War forces are set up for Lion Rampant.  Mounted in groups of six, heavy foot in sixes Infantry in twelves.  Some of the Blood and Crowns groups will be less than this so I'm ahead of the game.

I'll be starting with the period of the 2nd Scottish War of Independence, or the "Dispossessed."

I think I'm on track with the miniatures so I'm turning to the terrain.  I'm going to need three "Objectives" more buildings and woods, as well as some ship templates.

The Ships
I'm using RPG style templates.  These are all printed at A4 scale and mounted on black foamcore.  The fore and act castles are separate and also on foamcore, to give a definite height difference.


The buildings

I have a small collection of scratch built and Renedra plastic buildings for the period.  I'm planning another couple of farm buildings, a church and a city or castle gate.

The Forces

Given I'm using 3 boxes of Perry plastics for this project, and a few sprues of War games Atlantic Irish, I have some limitations in the armies I can muster.  I do however have a large Barons War collection that can be drawn on for support units.

  • The Kingdom of England, Wales & Ireland
    • England in France (Crecy to Poitiers) 1345-56
    • English Army in Scotland
    • England in France (Agincourt to Orleans) 1415-44
    • The Kingdom of France
    • Army of France (Crecy to Poitiers) 1345-56
    • Army of France (Azincourt) 1415
    • Army of France (Orleans & The Loire) 1428
  • The Scottish
    • The Wars of Independence
    • The Border Rievers
    • The Scottish in France,
  • The Irish
    • The Pale vs the Native Irish
    • The Scots in Ireland
    • The Wars in the Isles
  • The Iberian Kingdoms (Spanish Kingdoms)
    • The Castilian Civil War: Forces of Pedro de Castile (1351-69)
    • The Castilian Civil War: Enrique de Trastamara (1351-69)
  • UnalignedMercenaries & Pirates
    • Free Companies
    • Routiers
    • Pirates/Merchant Crew
  • Card-bid Initiative System – the 6 game turns are further divided into “rounds,” with each player activating a unit in each round. At the start of the round, players bid for initiative using a standard deck of playing cards. The player who wins the bid, chooses the order in which the players will activate their units for that round.
  • Activate Units – the cards used for bidding also determine the number of actions your unit will receive, cross referencing the card’s suit, with the activated unit’s experience. Cards more likely to win the initiative bid grant fewer actions, forcing players to choose a strategy which prioritizes speed or quantity.
  • Renown & Feats of Arms – Victory is determined by the amount of Renown each player has earned throughout the game. Scenarios will have their own ways to earn Renown, such as by burning (or defending) a critical building. Additionally, Renown can be earned through Feats of Arms – goals available to both players. Such Feats include the destruction of enemy forces, the capture of valuable enemy knights, and impressive displays of martial prowess such as the Glorious Charge.
  • Fatigue – representing the variety of conditions which can impact a unit’s battlefield performance, Fatigue is streamlined catch-all rule for stress, morale, physical exhaustion, and the piling on of minor wounds. You can even Push your troops to act beyond their normal limits, also earning Fatigue. Rally actions allow you to remove Fatigue, and Inspiring leaders can aid in this effort. Managing Fatigue is crucial to victory.
  • Legendary Armies – Players assemble forces of roughly 20-30 miniatures, led by a Commander and his Retinue. Forces are drawn from a common pool of units, representing the typical fighting men of the era; from noble Men at Arms and Esquires, to the lowly Footmen and Peasant Levies. Each unit has its own skills, equipment, and special rules. Units can vary in size, but the common size ranges from 3-8 for your heavily armored knights, and 4-12 for your more numerous footmen.
    Legendary heroes from history, such as ‘The Black Prince’ Edward of Woodstock and Joan D’Arc can also join your forces and lead them to victory. Each historical character has their own special rules and abilities to impact the game

The battles of the first 20 years.

1337 Battle of Cadzand.  Sir Walter Manny and the attempt on Sluys. (Or let's grab us a hostage!)
1338 Battle of Arnemuiden
1340 Battle of Sluys
1340 Battle of Saint-Omer
1340 Siege of Tournai
1341 Battle of Champtoceaux
1342 Battle of Brest
1342 Battle of Morlaix
1345.     - August Battle of Bergerac  
1345.     - October Battle Auberoche 
1346 Battle of St Pol de Léon
1346 Battle of Caen
1346 Battle of Blanchetaque
1346 Battle of Crécy
1346 Battle of Neville's Cross
1346–1347 Siege of Calais
1347 Battle of La Roche-Derrien 
1350 Les Espagnols sur Mer
1351 Capture of Saint-Jean-d'Angély
1351 Battle of Ardres
1351 Combat of the Thirty
1352 Battle of Mauron France
1353 Capture of Lusignan
1353 Battle of Comborn
1354 Battle of Montmuran
1356 Battle of Poitiers

The English
Sir Hugo de Farandole, formerly of Provence now of Durham, One of Sir Walter Manny's retained Knights
24 longbowmen
12 Men at arms

The French
Aimery, Compte de Phoque
12 Men at arms
12 Crossbowmen
12 Spearmen

Cadzand
Manny uses ribauld sailors, half his force.
Six villages
Plus he "town" of Cadzand
French relief force crosses the causeway at low tide.

Figures
English army Mma and LB
French Cb, Sp Mma
Mounted 12, 8 Mma 4 Horse holders.

3 x More ships, including the Nef.