Sunday 28 November 2021

"O" Group" Drop the bridge. 1940

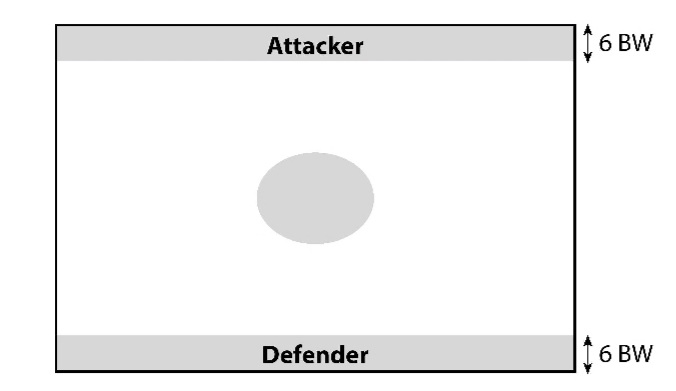
"O" Group" Drop the bridge.  Nouvion, 25th May 1940

The Cameron Highlanders hold the line to the Durham's right.  The Dorsets are on the left.  HQ has ordered a last stand whilst the beach  evacuation begins.  Several waves of Germans will attack the Durham's line, a Panzer attack, an Infantry attack and a Mixed Force attack.  This could get nasty.  

An engineer platoon has been attached to the Durhams and is under orders to drop the bridge.  If they succeed the Durhams will buy enough time to begin evacuating.  If they fail its off to a German POW camp.


German Aerial Recce Photo, Nouvion May 1940.

The famous girder bridge, pride of the town of Nouvion.  The Royal Engineers attached to the Durhams have plans to drop it into the river.

The North Durham Fusiliers

 HQ, F.O. and 3” mortars, along with three Infantry companies. 

An infantry company consists of one Company Commander and three Infantry Rifle platoons. British platoons were generally organised with three sections per platoon. 

My support choices are: 

Recce Carrier Platoon (One Infantry platoon with two carriers: 4 points) 

Support Platoon 

One Vickers MMG and one Boys AT Rifle 3 pts.

Lt Freddie Dibnah and his Engineer platoon, bridge demolition a speciality. 3pts.


365 Regt (the Bonn Boys) 1st Bn

Battalion HQ Company, including the HQ and FO, along with three Infantry companies. 

An infantry company consists of one Company Commander and three Infantry Rifle platoons. German platoons were generally organised on a square platoon structure of four sections per platoon.

Support Platoons 

Machine Gun Platoon  Three MG34 sections, 1 per company: 6 points

Reconnaissance Motorcycle Platoon: 3 Motorcycle sections: 4 points

Deep Pockets Reserves

1st Panzer, Lt Gruber in his Pz I, plus Smallhausen in an Sdkfz 222

1st Panzer, Hauptman Geering, Pz II troop, 2 tanks.

1st Panzer, Col. von Strohm Pz III troop, 2 tanks.


More than three ones in my set up roll gives the Germans a "hesitant" Company,  Not a good start.

The British Combat patrols go down,  The green dice indicates my HQ Orders.

The Germans get some Combat Patrols down and begin to creep forward

And the Germans bring on their armour in a race for the bridge

The Germans are trying to overcome the area around the bridge with heavy firepower.  

My old 1:200 Skytrex PzIV don`t really look the part except as generic German tanks.

The Durham fusiliers however are using the buildings for cover

And that Hesitant Company finally get moving, only to get hammered crossing the stream.

With its leading platoons suppressed the German A company is in trouble.

And a localised counter attack by the British carriers and a supporting platoon damages the Germans "B" Company too.  

The Germans cross the bridge but the lead tank is knocked out.

With orders to push the wreck clear the Germans try to get through

The bridge blows as Lt Pea, the former Grammar school science teacher, uses impromptu explosives.  Its a major win for the Durhams

Still, even with a win under their belts the Durhams must now withdraw to Dunkirk, and a final battle before evacuation.

Rebasing my Infamous 20mm Romans

A rebase of the 20mm Romans has been taking up my time here in Cyprus.  Its good that the basing dries out so quickly in the heat - even in November - but its a project that snuck up on me.  I doubled up on the bases making the Infamy unit of 8 figures into groups of 16.

The Romans were intended as an auxiliary force but I added a box of HaT Legionaries at the last minute.  The original intent was to field five groups of Auxiliaries and four Legionaries.  This has now become three and two respectively.

I'm leaving the cavalry and skirmishers at eight figure units, but increasing the size of their basing to look right.  The Early Imperial Roman army is much smaller as a result of this drive to get a better looking setup, but it's still powerful.

Legion Centurion and Optio

Two groups of Legionaries

Auxiliary Centurion and Optio

Three groups of Auxiliaries

One group of Auxiliary archers

One group of Auxiliary Cavalry

One group of slingers

One Legionary Scorpion bolt thrower.


When I turned to the Celts I had a slightly different problem.  The Italeri figures are excellent. I would rate them higher than even the few metal figures I have, but at 40 figures to a box I have only two groups.

Using bases of 4 and 2 figures I can match the frontage of the Romans, and a warband has six bases, making it easy to move about.  The Cavalry and skirmishers remain I groups of eight, and the Chariots in fours.

The HaT Germans that extend my "barbarians" are shockingly bad figures.  I'd rather not use them but needs must.  Eventually I'll replace them with more Italeri Celts.  They do give me another two warbands.

Chief, Sub Chief and hornblowers

One Warband of naked fanatics

Four Tribal Warbands 

Two groups of Cavalry

One group of Chariots

One group of Slingers

As part of this 20mm Infamy project I added to the terrain pieces with some Cork tile bogs and rough ground.

The pva glue is still drying on these, the idea is to give the bog pieces a shiny wet look.


I had already built the "German" looking A frame houses and several Roman buildings so it's looking like game on, as I get this lot on table for some fighting.

Saturday 20 November 2021

The Temple of Vectron

Men of Bronze Scenario 4: Desecrate the Sacred

The great god Vectron is the guardian of the city-state of Itchyas.  Bellendus the Tyrant takes his religion very seriously,  especially the bit with the goats. 

Unfortunately Scrotus, Tyrant of Polis-Hedanus and his army are targeting the temple of the Lord Vectron. It is up to the loyal people of Itchyas to defend it, and save our sacred Nanny 🐐...

Scenario 4: Desecrate the Sacred

The Attackers are placed along a long table edge up to 6 Base Widths in. The Defenders are on the opposite side also deployed up to 6 Base Widths in. Phalanx units can deploy in Phalanx.

The center of the board is the temple, an item of terrain no bigger than 12 Base Widths across in any dimension. The Defender may choose to place one unit in their army anywhere within 3 Base Widths of the sacred space.

Victory

If the Attacker gets a unit into the designated terrain and stays there for 1d3 turns they will be the winner. The number of turns is rolled when the unit enters the terrain and each additional unit in the terrain reduces the result roll by 1.

The Defender wins if they manage to Collapse the Attacker or stop them from desecrating the sacred.

The Game

Sector 1  A grove of trees
Sector 2  One level hill
Sector 3  A sacred spring
Sector 4  No additional 

Game terrain
1.  No additional
2.  One level hill
3.  Swamp pond or spring
4.  Grove of trees
5.  Stone Wall
6.  Two level hills

Bellendus (Blue)

Scrotus (Red)

The Temple of Vectron

Red advance with the Militia hoplites moving into support

And Blue advance into that narrow gap

Scrotus and his Red boys form phalanx and prepare to charge the temple garrison.

And I realise that the Blue left flank is not going to make it.

Scrotus goes in, good dice for the phalanx and the charge, but the Blue are at a height advantage in difficult terrain

The battle on the red right sees the peltasts come in on the flank as support.

The red throws back blue, but doesn't follow up into the terrain.

On the flank Blue smash it.  Red are routed in one melee round.

And Blue must reform, but over half of red are destroyed in this fight.

The Morale test doesn't go well for red (and those are not the dice roll for that!) Red morale collapses and Scrotas flees the field.
 
Good game based around a new terrain piece.  Can`t believe how downright bloody this game gets.

Thursday 18 November 2021

O Group. Somewhere near Arras.

It's May 1940, somewhere near Arras.  The British Army is somewhat in disarray, and the North Durham Fusiliers, a Territorial battalion, have been sent forward to stabilise the position.

The North Durhams:  HQ, F.O. and 3” mortars, along with three Infantry companies. An infantry company consists of one Company Commander and three Infantry Rifle platoons. British platoons were generally organised with three sections per platoon. 

My support options are: 

Carrier Platoon (One Infantry platoon with two carriers: 4 point) 

Support Platoon 

One Vickers MMG and one Boys AT Rifle:

British Infantry Training Characteristic

The following Training Characteristics apply to British troops in 1940

Smoke: On a Fire & Move Action, British units may use their 2” mortars to lay smoke. British infantry may choose to move only 2D6” and use the single highest score; or move the full 2D6” with no firing. Enemy units targeting them lose 1D6 firepower and apply the spotting dice during the platoon’s movement. No smoke is actually placed on the table.  

Carrier Platoon:When firing at close range, a Carrier Platoon adds two firepower dice instead of one. 

Boys AT Rifles: All British Regular or better infantry platoons have integral Boys AT Rifles. Second Line units do not. Second Line Infantry:Second Line British infantry apply the Limited LMG rule to account for Lewis guns instead of Bren guns and limited equipment at platoon level.

Second Line or Green battalions cannot choose the Carrier Platoon, Scout Platoon or Assault Pioneer Platoon.

The North Durhams


The Germans

211 Inf Division

365 Regt (the Bonn Boys) 1st Bn

Battalion HQ Company, including the HQ and FO, along with three Infantry companies. An infantry company consists of one Company Commander and three Infantry Rifle platoons. German platoons were generally organised on a square platoon structure of four sections per platoon.

Support Platoons 

Machine Gun Platoon  One MG34: 2 points

Reconnaissance Motorcycle Platoon: 3 Motorcycle sections: 4 points

365 Regt

German Infantry Training Characteristic.

Rate of Fire:German SF MMGs, attached MMGs and Infantry platoons gain: Each Double 6 rolled in their firepower dice results in one additional hit on their target. This does not apply to poorer equipped German units such as SS units using foreign made machine guns or Heer units using antiquated equipment Schutzenare classed as Panzergrenadiers.

All German infantry platoons have integral AT Rifles


=================================================

XXXXX, France

Dear Mama,

Just a quick letter to tell you that I`m fine.  We are at XXXXXXXXX  near XXXXXX in XXXXX.  The Brigadier has XXXXXXX, but he recovered and will not XXXXXX again.  We go in at XXX in the XXXXXXX.  I shall send you a German XXXXXX for your collection.

Your loving son,

Herbert Farthingdale 1 NDF


The Game

a.  ESTABLISH BATTALION FORCES & BATTALION HQ RATING.
Both sides are Regulars.  
The British are the Attacking HQ and start the game with three HQ Orders, The Germans are and start with two HQ Orders.

b.  DEFINE TERRAIN.
The woods and BUAs block line of sight.  The lanes are sunken and provide light cover to troops within them.

c.  SET PLAN & ESTABLISH OBJECTIVES.
British Plan.
A Coy Right of road, B Coy Left, C Coy in reserve.
First Objective is the central BUA, and is A Coy Objective.   The rearward BUA is the secondary objective and is B Coy Objective.  

German
A Coy Left of Central BUA, B Coy Right of Central BUA.
B Coy in reserve.  MG34 platoon in village under B Coy.

Tactical Superiority. 
The British require three FUBAR as their victory condition based on defeating the opposing 
German Battalion.  The Germans must prevent this.

d.  DEFENDER'S & ATTACKER'S DEPLOYMENT.
For this game I`ll deploy both Battalion HQs on their respective baselines.
On table Company Commanders deploy.

e.  BEGIN TURN ONE.
Here we go...

Defending commanders deploy first behind the Forward Defensive 

Line within their assigned sector. Attacking commanders then deploy behind the Start Line within their assigned sector.

Battalion Deployment Dice. Both players now roll their Battalion Deployment dice. 

Attackers roll nine dice, or ten dice if a Large battalion. Defenders roll nine dice. Players note the deployment dice scores against the Deployment Tables below and then deploy their initial units and Combat Patrols based on these scores. All remaining Battalion units are placed off table in reserve.

Somewhere near Arras

My British HQ goes down.

The British use recce carriers.  Losing these will not count towards a FUBAR

365 Regt use the sunken lanes for cover.

The Woods are crawling with Germans, and a supporting MMG section helps this platoon out against the carriers.

A Company is out in the open with the Germans now in those woods.  Time to rethink.
B Company firefight with the Germans in the sunken lane.

Meanwhile A Company can only move against the German centre by using cover.

Not really a firefight that the Germans are winning.

Finally I lose the carriers

In a cracking move I manage to get an MMG into enfilade on the sunken lane.  It hammers the Germans with six hits.

C Company passes B, and moves onto objective two.

A Company moves forward and takes the centre of the position.  The Germans now have three FUBARs and the Durhams have won the game.

Still in Campaign terms its a retreat for the Durhams next., They are to withdraw on Nouvion and then on to Dunkirk.  Meanwhile the Panzers move forward to cut them off.

A good intro to O Group, but I will need to run these rules again (several times I think) to get a better grasp of the mechanics.