

Platoon HQ
Lieutenant, Senior Leader armed with pistol
Platoon Sergeant, Senior Leader, armed with
SMG
PIAT Team, 2 men
2" mortar Team, 2 men
SECTIONS 1-3
Corporal, Junior Leader armed with Sten
BREN TEAM Bren LMG Three crew
RIFLE TEAM Six riflemen
1 x 24th Lancers Sherman tank with a Junior leader @6
1 x Stuart light tank @5
Additional PIAT Team 2 men @2
Platoon HQ
Oberscharführer, Senior Leader with Machine
Pistol
Three panzerfaust 30
SQUADS 1-3
Scharführer, Junior Leader armed with machine pistol.
LMG TEAM MG42 Three crew
LMG TEAM MG42 Three crew
88mm A/T gun five crew, Scharführer, Junior Leader
ATTACHED ARMOUR
Panzer IV H Scharführer, Junior Leader

If the DLI can clear the Germans from this table they will be in position to launch an attack directly onto Point 110. If the Germans hold then the flanking game on table 4 will be far more difficult.
 |
| The bocage flanking Point 110 |
 |
| Three Pz Gren LMG teams go on table. DLI have a big challenge crossing this open ground. |
My plan for the DLI will be to drop smoke into the bottom left corner and flank along that hedgerow.
The PzGren will defend the hedgerow keeping a reserve to watch for the attack.
 |
| A DLI section goes on table, with the mortar in support. Note the CSM is the senior leader with them. |
 |
| The Germans cover the centre with an attached 88mm A/T gun |
 |
| Puff of smoke as the smoke round lands almost bang on. |
 |
| The Germans summon up a perfect dice roll. A PzIV trundles off the jump off point. |
 |
| Apparently the 24th Lancers used a Sherman here. Well it was at the top of the box. Is that Brad Pitt sitting in the turret? |
 |
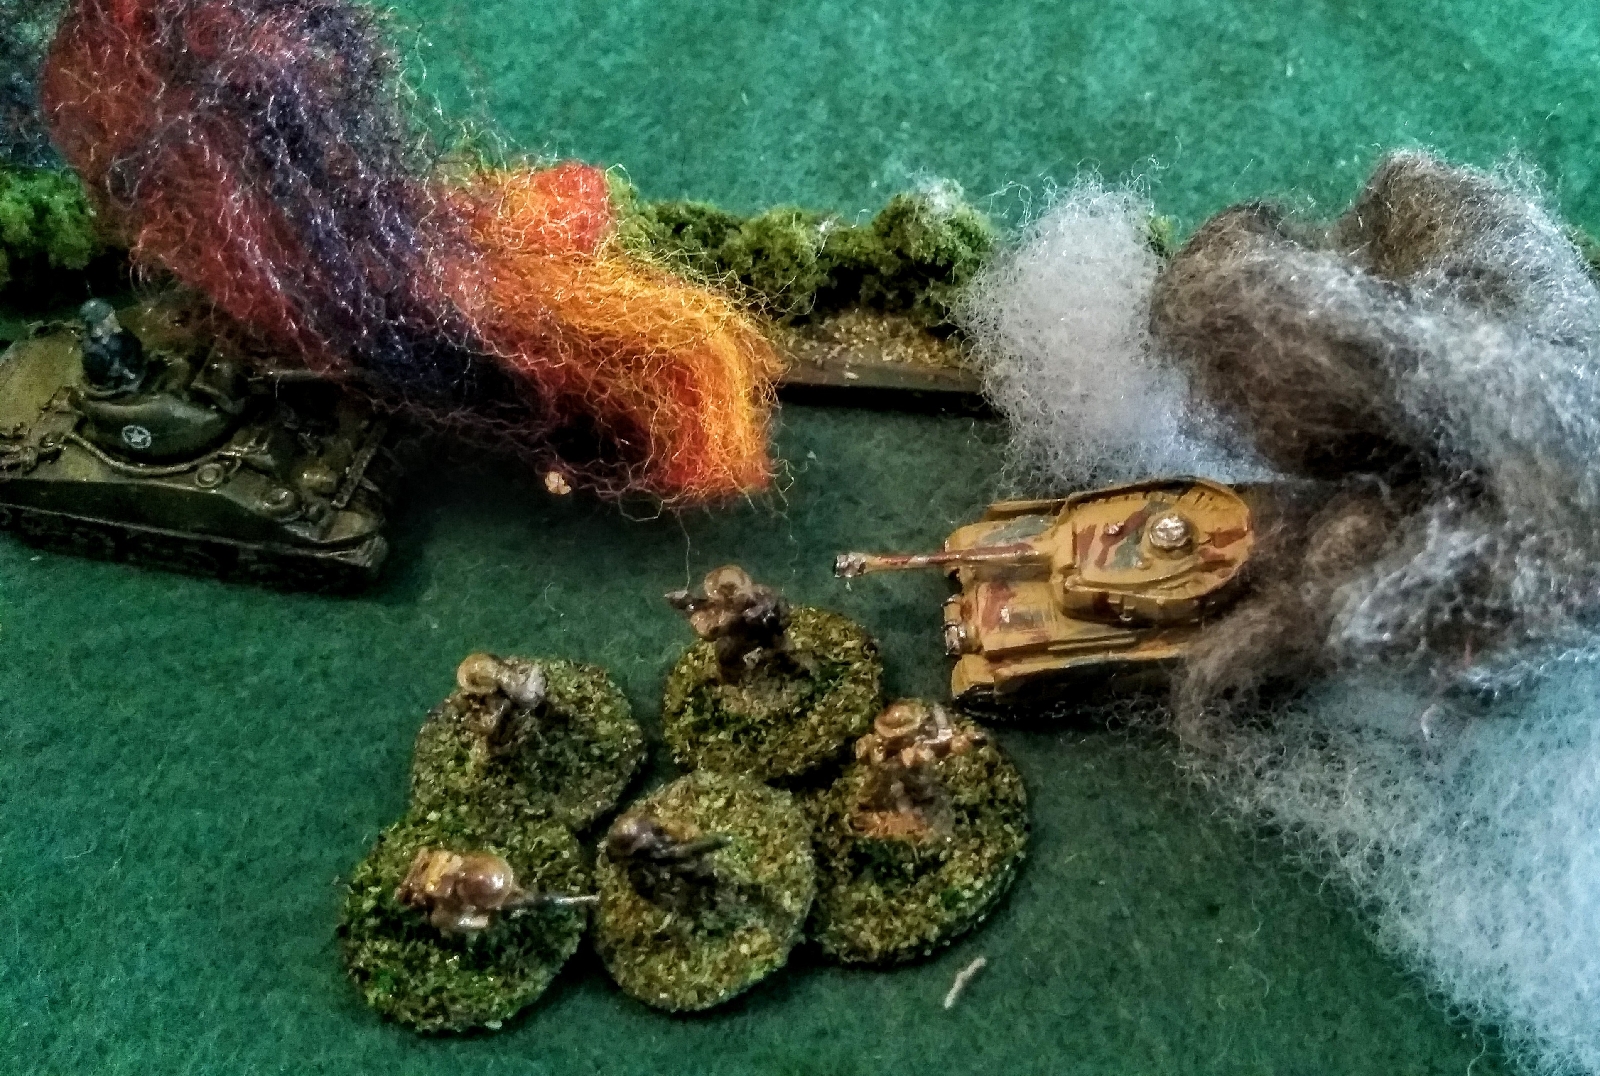
| One of those "Cor Blimey" moments. The PzIV comes out of the smoke and fires. That's the end of Brad. |
 |
| Desperate straits. The CSM leads an infantry attack on the tank |
 |
| Shouldn't work but he blows off a track. DSM awarded right there. |
 |
| The Durhams melee across the hedge. It's one sided. |
 |
| Casualties: four British including the Corporal, seven Germans. |
 |
| And the Germans next COC roll was this. I mean really? |
 |
| The DLI push another section to the tree line. |
 |
| And the CSM directs Bren fire onto the German A/T gun, wiping out it's crew. |
 |
| The Big Man done good. Paying for an extra senior leader paid off as the Germans scarper back towards Point 110. The next game will be table 4 an attempt to flank the high ground before assaulting on table 5. |

No comments:
Post a Comment